Serve a Pelican Origin
Pelican users who want to share data within a Pelican federation do so via an Origin. Origins are a crucial component of Pelican's architecture for two reasons: they act as an adapter between various storage backends and Pelican federations, and they provide fine-grained access controls for that data. That is, they figure out how to take data from wherever it lives (such as a POSIX filesystem, S3 buckets, HTTPS servers, etc.) and transform it into a format that the federation can utilize while respecting your data access requirements.
NOTE: An important distinction between origins and data backends is that, generally speaking, origins do NOT store any data themselves; their primary function is to facilitate data accessibility.
This document contains instructions on how to serve a Pelican origin on top of a variety of storage backend types.
Before Starting
Install Pelican
If you haven't installed Pelican, follow the instructions to install pelican.
For Linux users, it is recommended to install Pelican using one of the package managers (RPM, APK, Deb, etc.) so that Pelican dependecies are automatically handled. You may also run a Pelican docker image to serve a Pelican origin. If you prefer to install Pelican as a standalone binary, you need to follow additional instructions (opens in a new tab) to install dependencies for the Pelican origin server.
NOTE: Serving origins with a standalone Pelican binary is possible, but not recommended.
MacOS and Windows users who want to serve a Pelican origin should use the Pelican docker image.
Open Firewall Port for Pelican Origin
At their core, Pelican origins are web servers that listen to two TCP ports for file transfers and Web UI. By default, the Web UI and API interface for your origin will be at port 8444, and the port for object transfers will be at 8443. You may change these port numbers through the configuration file with parameters Server.WebPort and Origin.Port, respectively.
In order for Pelican origins to work properly, these ports need to be accessible by the federation, which in most cases means they need to be open to the internet. If your server host has a firewall policy in place, please open these two ports for both incoming the outgoing TCP requests.
NOTE: If it is not possible for you to expose any ports through the firewall (e.g. you're on a local network or behind a NAT), Pelican has a special feature called a Connection Broker that allows you to serve origins without publicly-accessible ports and TLS credentials. However, this is an experimental feature and requires the Pelican federation you are joining to be compatible. If you are interested in learning more about the Connection Broker, please contact help@pelicanplatform.org for further instructions.
Prepare TLS Credentials
Data transfers in Pelican rely on HTTPS, the encryption scheme used by everyone from banks to instagram that's responsible for securely transmitting data between internet-connected computers. To configure the origin with HTTPS, you'll first need to acquire three things:
- A valid Transport Layer Security (TLS) certificate
- The private key associated with the certificate
- The Intermediate Certificate or the chain file, that establishes the trust chain to a root certificate
NOTE: For local development and testing, you may skip setting up TLS credentials by setting configuration parameter
TLSSkipVerifytotrue. You should NOT set this for production, as it makes all data, including your passwords, available to anyone who can monitor your network.
You need to contact a Certificate Authority (CA) who owns the root certificate for getting these credentials. One popular CA that provides free TLS certificates is Let's Encrypt (opens in a new tab). You may follow their guide (opens in a new tab) to obtain the credentials listed above. Note that you need to have a valid domain before proceeding.
Once you go through the process, locate your credential files and set the following parameters to the file locations or copy the credential files to the default locations of the parameters:
-
Server.TLSCertificate- The certicate file from Let's Encrypt (or another CA), usually named as
example.com.crtorexample.com.pem - Default location:
~/.config/pelican/certificates/tls.crtfor non-root users or/etc/pelican/certificates/tls.crtfor root users.
- The certicate file from Let's Encrypt (or another CA), usually named as
-
Server.TLSKey- The private key corresponding to the TLS certificate, usually named as
example.com.key. - Default location:
~/.config/pelican/certificates/tls.keyfor non-root users or/etc/pelican/certificates/tls.keyfor root users.
- The private key corresponding to the TLS certificate, usually named as
-
Server.TLSCACertificateFile- The intermediate certificate from Let's Encrypt to establish the trust chain to a root certificate, usually named as
letsencrypt-intermediate.pemorchain.pem - Default location:
~/.config/pelican/certificates/tlsca.pemfor non-root users or/etc/pelican/certificates/tlsca.pemfor root users.
- The intermediate certificate from Let's Encrypt to establish the trust chain to a root certificate, usually named as
Since your TLS certificate is associated with your domain name, you will need to change the default hostname of Pelican server to be consistent. Set Server.Hostname to your domain name (e.g. example.com).
Serving Origins
When you've completed the aforementioned steps, you're ready to start configuring the origin that will add your data to a federation. Serving an origin is the process of taking some underlying storage repository and making its data accessible via a namespace prefix in your federation. For example, you might make files in the directory /my/directory available at the federation path /my/namespace so that anyone with access to the federation can get objects from the directory
By default, Pelican origins serve files from a POSIX backend, the filesystem used by Linux computers. However, Pelican aims to support a variety of backends and we currently also support serving objects from S3. Configuration for S3 is mostly similar to configuration for POSIX filesystems, but with a few important differences. For information about S3 backends, jump to the S3 documentation below.
If you are running Pelican docker image to serve an origin, please refer to the docker image documentation.
Find a federation to join
Before serving an origin, you need to decide which federation your data will be accessed through. For example, the Open Science Data Federation (OSDF) is Pelican's flagship federation, and if you are interested in serving an OSDF origin, you can refer to the OSDF website (opens in a new tab) for details about how to join.
Federations are identified their URL, which is used to host information that origins need for discovering other federation services. For example, the OSDF's federation URL is https://osg-htc.org, and an origin that joins the OSDF will visit https://osg-htc.org/.well-known/pelican-configuration to get important metadata about the federation's central services (the Director and Registry).
To point your origin at a specific federation, you can either pass the -f <federation URL> flag if running from the command line, or configure Federation.DiscoveryUrl: <federation URL> in your config yaml.
Starting the Origin
Origins can be configured via the command line, a config file named pelican.yaml, environment variables, or through a combinations of the three. While simple origins can be run entirely from command line arguments, more complex origins will require configuration your your pelican.yaml.
To start a simple pelican origin from the command line that serves POSIX data, run:
pelican origin serve -f <federation URL> -v </path/to/data>:</your/federation/prefix>Where:
<federation URL>is the federation URL discussed above</path/to/data>is the absolute path to the directory containing files you want to export as Pelican objects in your federation</your/federation/prefix>is the federation prefix at which files in/path/to/datawill be accessed from in the federation. Note that federation prefixes follow POSIX path conventions, and they must begin with/to denote an absolute path.
NOTE: By default, origins require authorization tokens for object access. Pelican currently does not support serving a public origin using only the command line, but various access controls can be configured through your configuration file. For more information, see origin capabilities below.
To run the same origin using a pelican.yaml configuration file, save your configuration to /etc/pelican/pelican.yaml if you're running Pelican as root, or at ~/.config/pelican/pelican.yaml if you're running as a non-root user. The command line origin from above could be configured accordingly:
# Tell Pelican which federation you're joining
Federation:
  DiscoveryUrl: <federation URL>

# Configure your Origin
Origin:
  # POSIX is the default storage type for Pelican origins
  # and can be omitted
  StorageType: "posix"

  Exports:
    - StoragePrefix: "/path/to/data"
      FederationPrefix: "/your/federation/prefix"
      # Explicitly state what capabilities you want this prefix to have
      Capabilities: ["Reads", "Writes"]
and then simply run
pelican origin servePelican will read the config file and apply it to your origin.
Finally, origins can be configured to a limited extent with environment variables. In Pelican's environment variable model, configuration options are taken from pelican.yaml, flattened, and prepended with either PELICAN_ or OSDF_, depending on the name of the binary you're using (i.e. whether you run osdf serve or pelican serve commands).
For example, you might configure the origin's storage type by setting the environment variable PELICAN_ORIGIN_STORAGETYPE=posix.
NOTE: Environment variable configuration does not support complex structures that can be built with yaml configuration, such as
object-type parameters.
The first time the origin is started, you will see something that looks like the following:
$ pelican origin serve -f https://osg-htc.org -v $PWD:/demo

Pelican admin interface is not initialized
To initialize, login at https://localhost:8444/view/initialization/code/ with the following code:
551220
See the admin website configuration documentation section for more information about initializing your origin's admin website.
Origin and Namespace Capabilities
Origins and namespaces can be configured with a set of capabilities, which are the configuration options used to define data access controls. In the previous yaml configuration, we configured the origin capabilities using the Capabilities list of the Origin.Exports block by specifying that the federation prefix /your/federation/prefix supports "Reads" and "Writes". This list of capabilities can be used for further control of what types of operations the namespace is willing to support. Available capabilities include:
- "Reads": When included, objects from the namespace can be read with a valid authorization token.
- "PublicReads": When set, objects from the namespace become public and require no authorization to read.
- "Writes": When included, objects can be written back to the storage backend by Pelican. Write operations always require a valid authorization token.
- "DirectReads": When included, a namespace indicates that it is willing to serve clients directly and does not require data to be pulled through a cache. Disabling this feature may be useful in cases where the origin isn't very performant or has to pay egress costs when data moves through it. Note that this is respected by federation central services, but may not be respected by all clients.
- "Listings": When included, the namespace indicates it will allow object discovery. Be careful when setting this for authorized namespaces, as this will allow anyone to discover the names of objects exported by this namespace.
NOTE: Most origins should have either "Reads" or "PublicReads" enabled. If neither is set, the origin won't export any data.
There is an important distinction between origin capabilities and namespace capabilities. While it's sometimes easy to treat origins and namespaces as the same thing, Pelican must distinguish between them because two separate origins may export portions of the same namespace, and a single origin may export two disparate prefixes. The only exception to this rule is when a single origin serves a single namespace, or the origin exports multiple prefixes that should all have the same capabilities.
To configure origin capabilities, you can set top-level options for the origin:
Origin.EnableReads: When true, the origin supports reads that are accompanied by a valid authorization token.Origin.EnablePublicReads: When true, the origin supports reads by anyone without an authorization token.Origin.EnableWrites: When true, objects can be written back to the storage backend through the origin. Writes always require a valid authorization token.Origin.EnableDirectReads: When true, the origin indicates it's willing to serve clients directly, potentially without caching data. Note that this is respected by federation central services, but may not be respected by all clients.Origin.EnableListings: When true, the origin will allow object discovery.
If no Origin.Exports block is provided to Pelican, these values will also be applied to your federation prefix.
NOTE: Pelican tries to resolve differences between origin and namespace configurations by respecting the more restrictive of the two. If you serve an origin that enables public reads, but the underlying prefix it exports disables all reads, you won't be able to read from that namespace.
Multi-Export Origins
Click to see more...
The previous examples have shown how one might export a single namespace, but Pelican origins can export multiple paths from the same storage backend under different namespaces. For example, assume you have have two posix directories called /my/data/public and /my/data/private. If you want to make your public data available under the namespace /my/prefix/public and your private data available under /my/prefix/private, you'll need to configure a multi-export origin, which is accomplished through the origin's Exports block. Below is an example of what that looks like, along with how you could configure access control for the two namespaces:
Federation:
  DiscoveryUrl: https://my-federation.com

Origin:
  StorageType: posix

  # The actual namespaces we export
  Exports:
    - StoragePrefix: /my/data/public
      FederationPrefix: /my/prefix/public
      # Don't set Reads -- it should be toggled true by setting PublicReads
      Capabilities: ["PublicReads", "Listings", "DirectReads"]
    - StoragePrefix: /my/data/private
      FederationPrefix: /my/prefix/private
      # We set "Reads" but not "PublicReads" indicating we want authorization
      Capabilities: ["Reads", "DirectReads"]
NOTE: While multiple namespaces can be exported by the same origin, they must all have the same underlying storage type. That is, if the origin serves files from POSIX, it must only serve files from POSIX and not S3.
Additional Command Line Arguments for Origins
This section documents additional arguments you can pass via the command line when serving origins.
-
-h or --help: Output documentation on the
servecommand and its arguments. -
-m or --mode: Set the mode for the origin service ('posix'|'s3, default to 'posix').
-
-p or --port: Set the port at which the Pelican admin website should be accessible.
-
--writeable: A boolean value to allow or disable writting to the origin (default is true).
-
--config: Set the location of the configuration file.
-
-d or --debug: Enable debugging mode, which greatly increases the Pelican's logging verbosity
-
-l or --log: Set the location of a file that will capture Pelican logs. Setting this will prevent logging output from printing to your terminal.
For more information about available yaml configuration options, refer to the Parameters page.
Launch the Origin With an S3 Storage Backend
Click to see more...
What is S3?
S3, or "Simple Storage Service" is a type of object store introduced by Amazon Web Services (AWS) in 2006. Since then, the term S3 has grown to represent both the service offered by Amazon as well as the protocol used both by Amazon and many other providers who have no AWS affiliation. In general, Pelican works with any S3 provider and is not limited to what's offered by AWS. References to "S3" in Pelican documentation should be interpreted as "S3 the protocol."
Unlike POSIX, which uses "files" organized into hierarchical directories with associated owners/permissions and a host of other metadata that are packaged together to act as a fundamental unit, S3 works with "objects" stored in "buckets". Typically, objects consist of data, metadata, and a unique identifier and they are stored in a flat address space referred to as a bucket. Because of this, there is no inherent hierarchy or nesting like there would be in a file system. One goal of Pelican is to obfuscate the underlying differences between storage backends like these so that users can enjoy a common interface for all there data, wherever it may happen to come from.
Serving an S3 Origin
Serving S3 origins with Pelican is similar to serving POSIX origins, but with several key differences. The first is that Pelican must be configured to host an S3 backend, using the configuration option Origin.StorageType = s3. To make your work with S3, it needs to know at least four additional things:
- The URL you use to access objects from S3, also known as the S3 Service URL
- The region that your S3 instance is hosted out of (almost always
us-east-1unless you're actually using S3 from Amazon) - The name of the bucket your objects are stored in
- The type of bucket hosting used at the S3 service URL, which can be either path or virtual. This determines whether objects are normally accessed like
https://<S3 service url>/<bucket name>/<object name>(path-style hosting) orhttps://<bucket name>.<S3 service url>/<object name>(virtual-style hosting), but does not change the way you access objects through Pelican. In many cases, it's safe to assume path-style hosting, and this is set to Pelican's default. For more information about different hosting styles in S3, see the AWS documentation (opens in a new tab).
NOTE: Pelican has a special mode where no bucket information is provided that allows you to export objects from all public buckets at a given service URL. This is covered in further detail later in this section.
The service URL, region, and hosting style can be configured using the Pelican config variables Origin.S3ServiceUrl, Origin.S3Region, and Origin.S3UrlStyle.
Additionally, some buckets might require credentials that prove you're allowed to access the objects they contain. In S3, these credentials are called the access key and secret key (In some cases the access key may also be referred to as the API key). Essentially, they can be treated like a username and password, where the access/API key is your username and the secret key is your password. When a bucket you'd like to export requires authentication, you'll need to pass these values to Pelican by putting your keys in separate files and telling Pelican where those files can be found via either the Origin.S3AccessKeyfile variable or the Origin.Exports.S3AccessKeyfile. See below for examples of S3 origin configurations that use these values, along with an explanation of how to choose which one is right for you.
S3 Configuration Examples
Origins can be configured with multiple exports by using the Origin.Exports block of your configuration:
Origin:
  # Things that configure the origin itself
  # Tell the origin it will be serving objects from S3
  StorageType: "s3"
  S3ServiceUrl: "https://my-s3.com"
  S3Region: "us-east-1"
  S3UrlStyle: "virtual"

  # The actual namespaces we export. Each export is defined
  # via its own export block
  Exports:
    - S3Bucket: "first-bucket"
      FederationPrefix: /first/namespace
      Capabilities: ["PublicReads", "Writes", "Listings", "DirectReads"]
    - S3Bucket: "second-bucket"
      S3AccessKeyfile: "/path/to/second/access.key"
      S3SecretKeyfile: "/path/to/second/secret.key"
      FederationPrefix: /second/namespace
      # Notice we designate "Reads" and not "PublicReads" for this bucket
      # because we assume that if the bucket requires credentials to access,
      # the origin should, too.
      Capabilities: ["Reads", "Writes"]
In this example, the object foo from the bucket first-bucket would be accessible without any token authorization at the namespace path /first/namespace/foo. Getting the object bar from second-bucket would require a valid access token, and would be accessed via /second/namespace/bar. In this example, the actual bucket names hosting foo and bar are elided from a Pelican user's perspective, because they are accessed through the namespace. If you'd like make users aware of the underlying bucket name, you can use the bucket name as your FederationPrefix.
Alternatively, if your origin only exports a single bucket, the origin can be configured with top-level config variables (which could also be configured with their equivalent environment variables):
Origin:
  StorageType: "s3"
  S3ServiceUrl: "https://my-s3.com"
  S3Region: "us-west-2"
  S3UrlStyle: "path"

  FederationPrefix: /my/namespace
  S3Bucket: "my-bucket"
  S3AccessKeyfile: "/path/to/access.key"
  S3SecretKeyfile: "/path/to/secret.key"

  # Set up origin capabilities that are also applied to the bucket
  EnableWrites: false
  EnableReads: true
  EnableListings: false
  EnableDirectReads: true
Exporting An Entire S3 Endpoint
In some cases, it may be infeasible to set up an origin that exports every bucket you'd like to make accessible via a Pelican federation. For example, Amazon's Open Data program (opens in a new tab) hosts many terabytes of public data across thousands of buckets and a handful of regions. Manually enumerating all of these buckets in an origin config would quickly become intractable. Instead, Pelican provides a mechanism that allows you to export all the public buckets from an S3 endpoint. This is accomplished by omitting the bucket field when you set up the export. The following example could be used to set up an origin that exports AWS public data from the us-east-1 region.
Origin:
  # Things that configure the origin itself
  # Tell the origin it will be serving objects from S3
  StorageType: "s3"
  S3ServiceUrl: "https://s3.us-east-1.amazonaws.com"
  S3Region: "us-east-1"
  S3UrlStyle: "virtual"

  # The actual namespaces we export. Each export is defined
  # via its own export block
  Exports:
    - FederationPrefix: /aws-public
      Capabilities: ["PublicReads", "Listings", "DirectReads"]
In this configuration, users who wish to fetch objects from the origin will still need to know the name of the bucket that hosts those objects. For example, the AWS public bucket noaa-wod-pds has an object called MD5SUMS, and with this configuration the object can be fetched at /aws-public/noaa-wod-pds/MD5SUMS.
Login to Admin Website
After your origin is running, the next step is to initialize its admin website, which can be used by administrators for monitoring and further configuration. To initialize this interface, go to the URL specified in the terminal. By default, it should point to https://localhost:8444/view/initialization/code/ (opens in a new tab)
You will be directed to the page to activate the website with a one-time passcode. Copy the passcode from the terminal where you launch Pelican origin and paste to the website to finish activation.
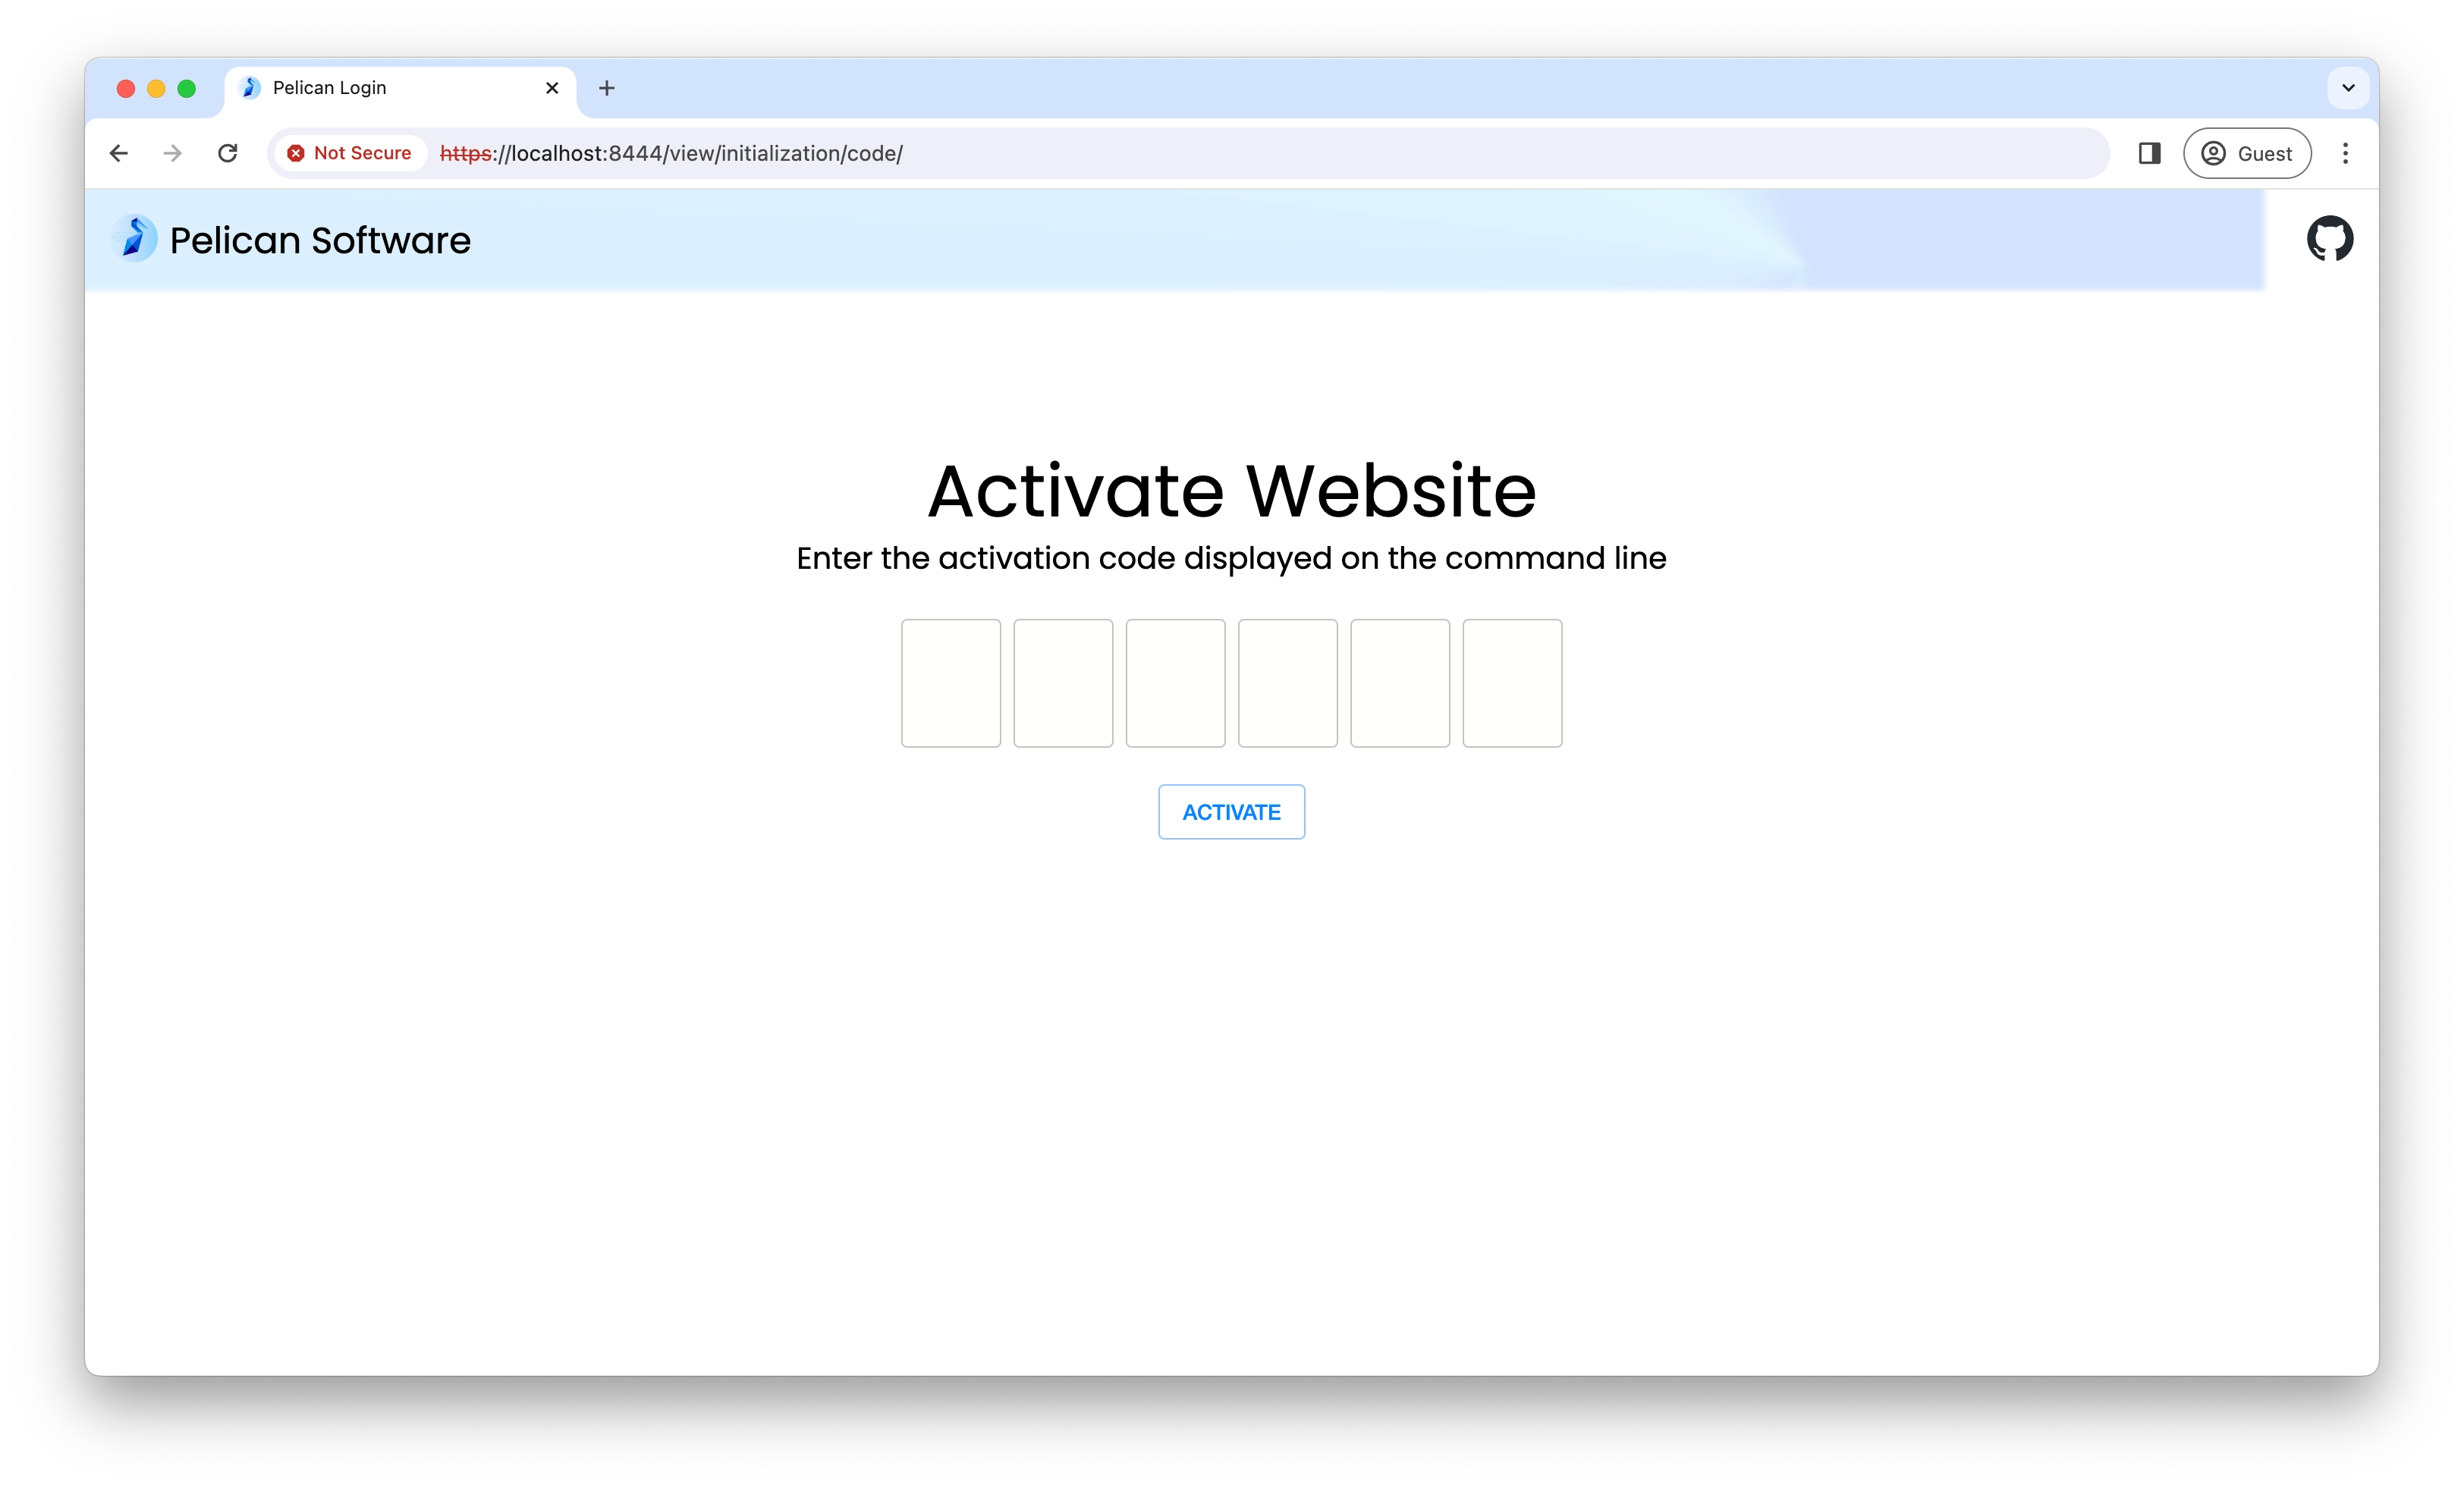
In our case, it's 551220 from the example terminal above.
NOTE: that your one-time passcode will be different from the example.
NOTE: These one-time passcodes will be refreshed every minute. Find the latest passcode in the terminal before proceeding.
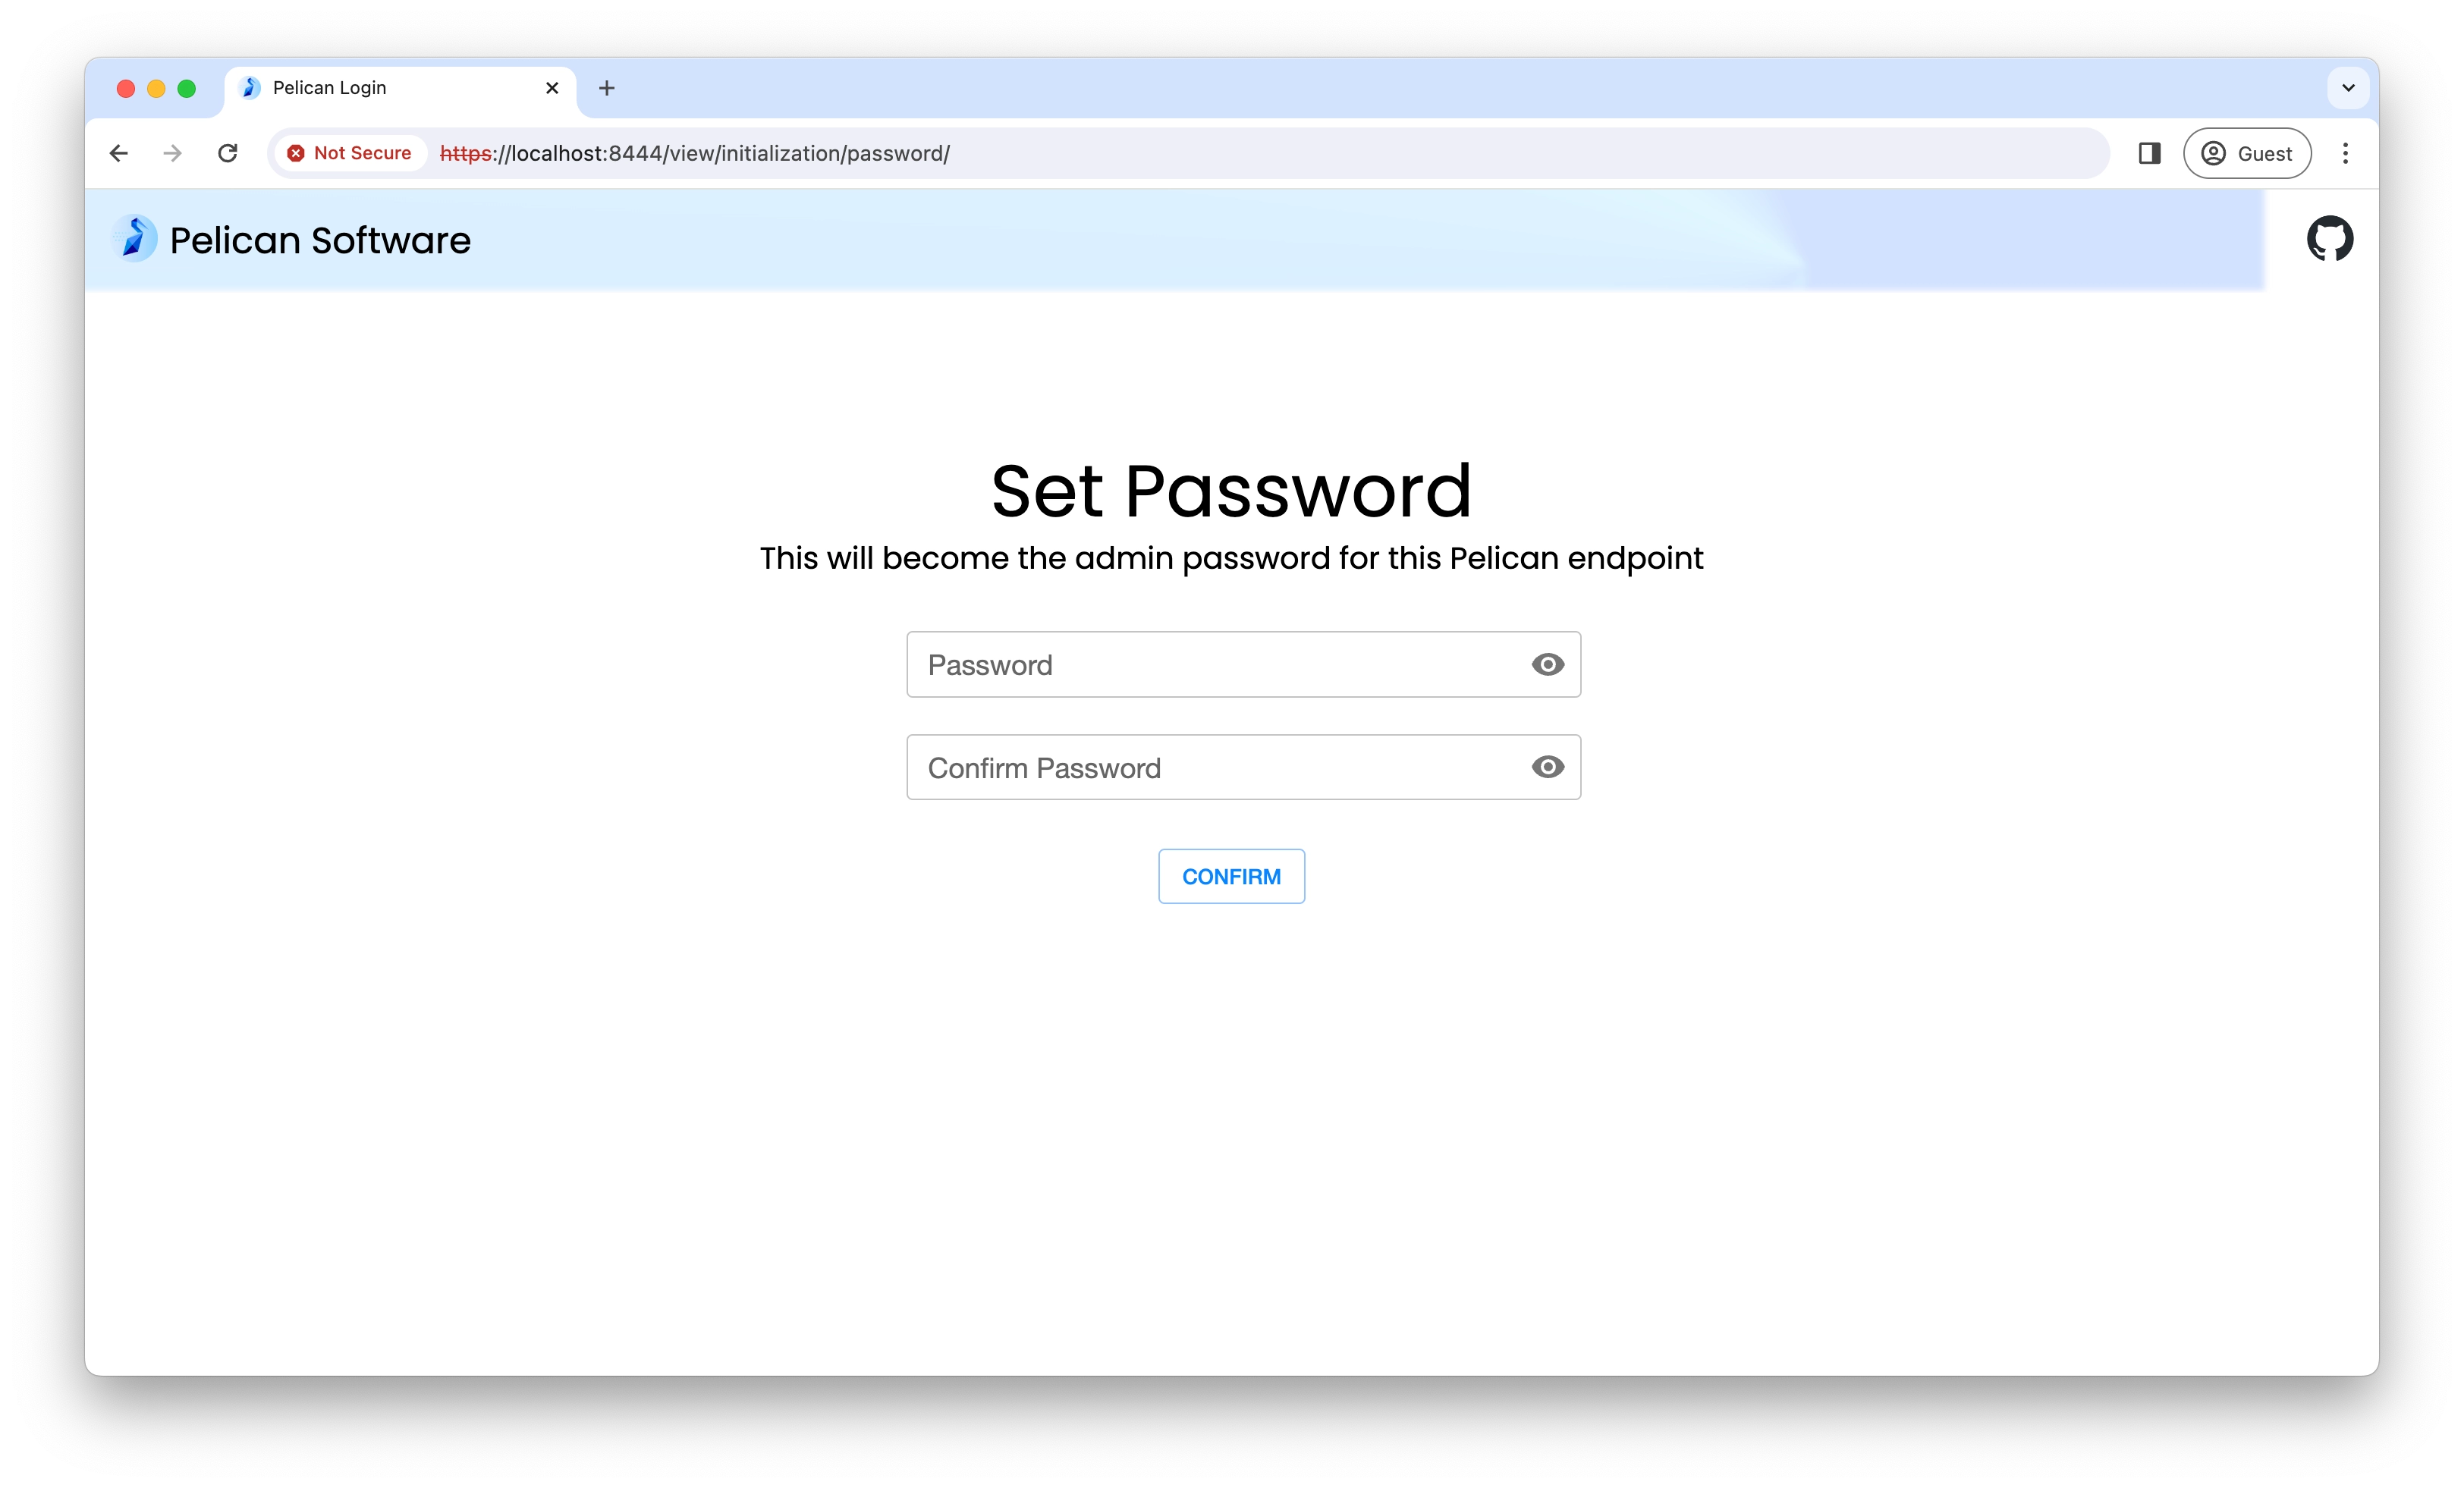
Set up password for the admin
After activating the website, you will be redirected to set up the password for the admin account. Type your password and re-type again to confirm. Then store this password in a safe location.
Visit the Origin's Dashboard Page
Once the password is confirmed, you will be redirected to the origin's dashboard page.
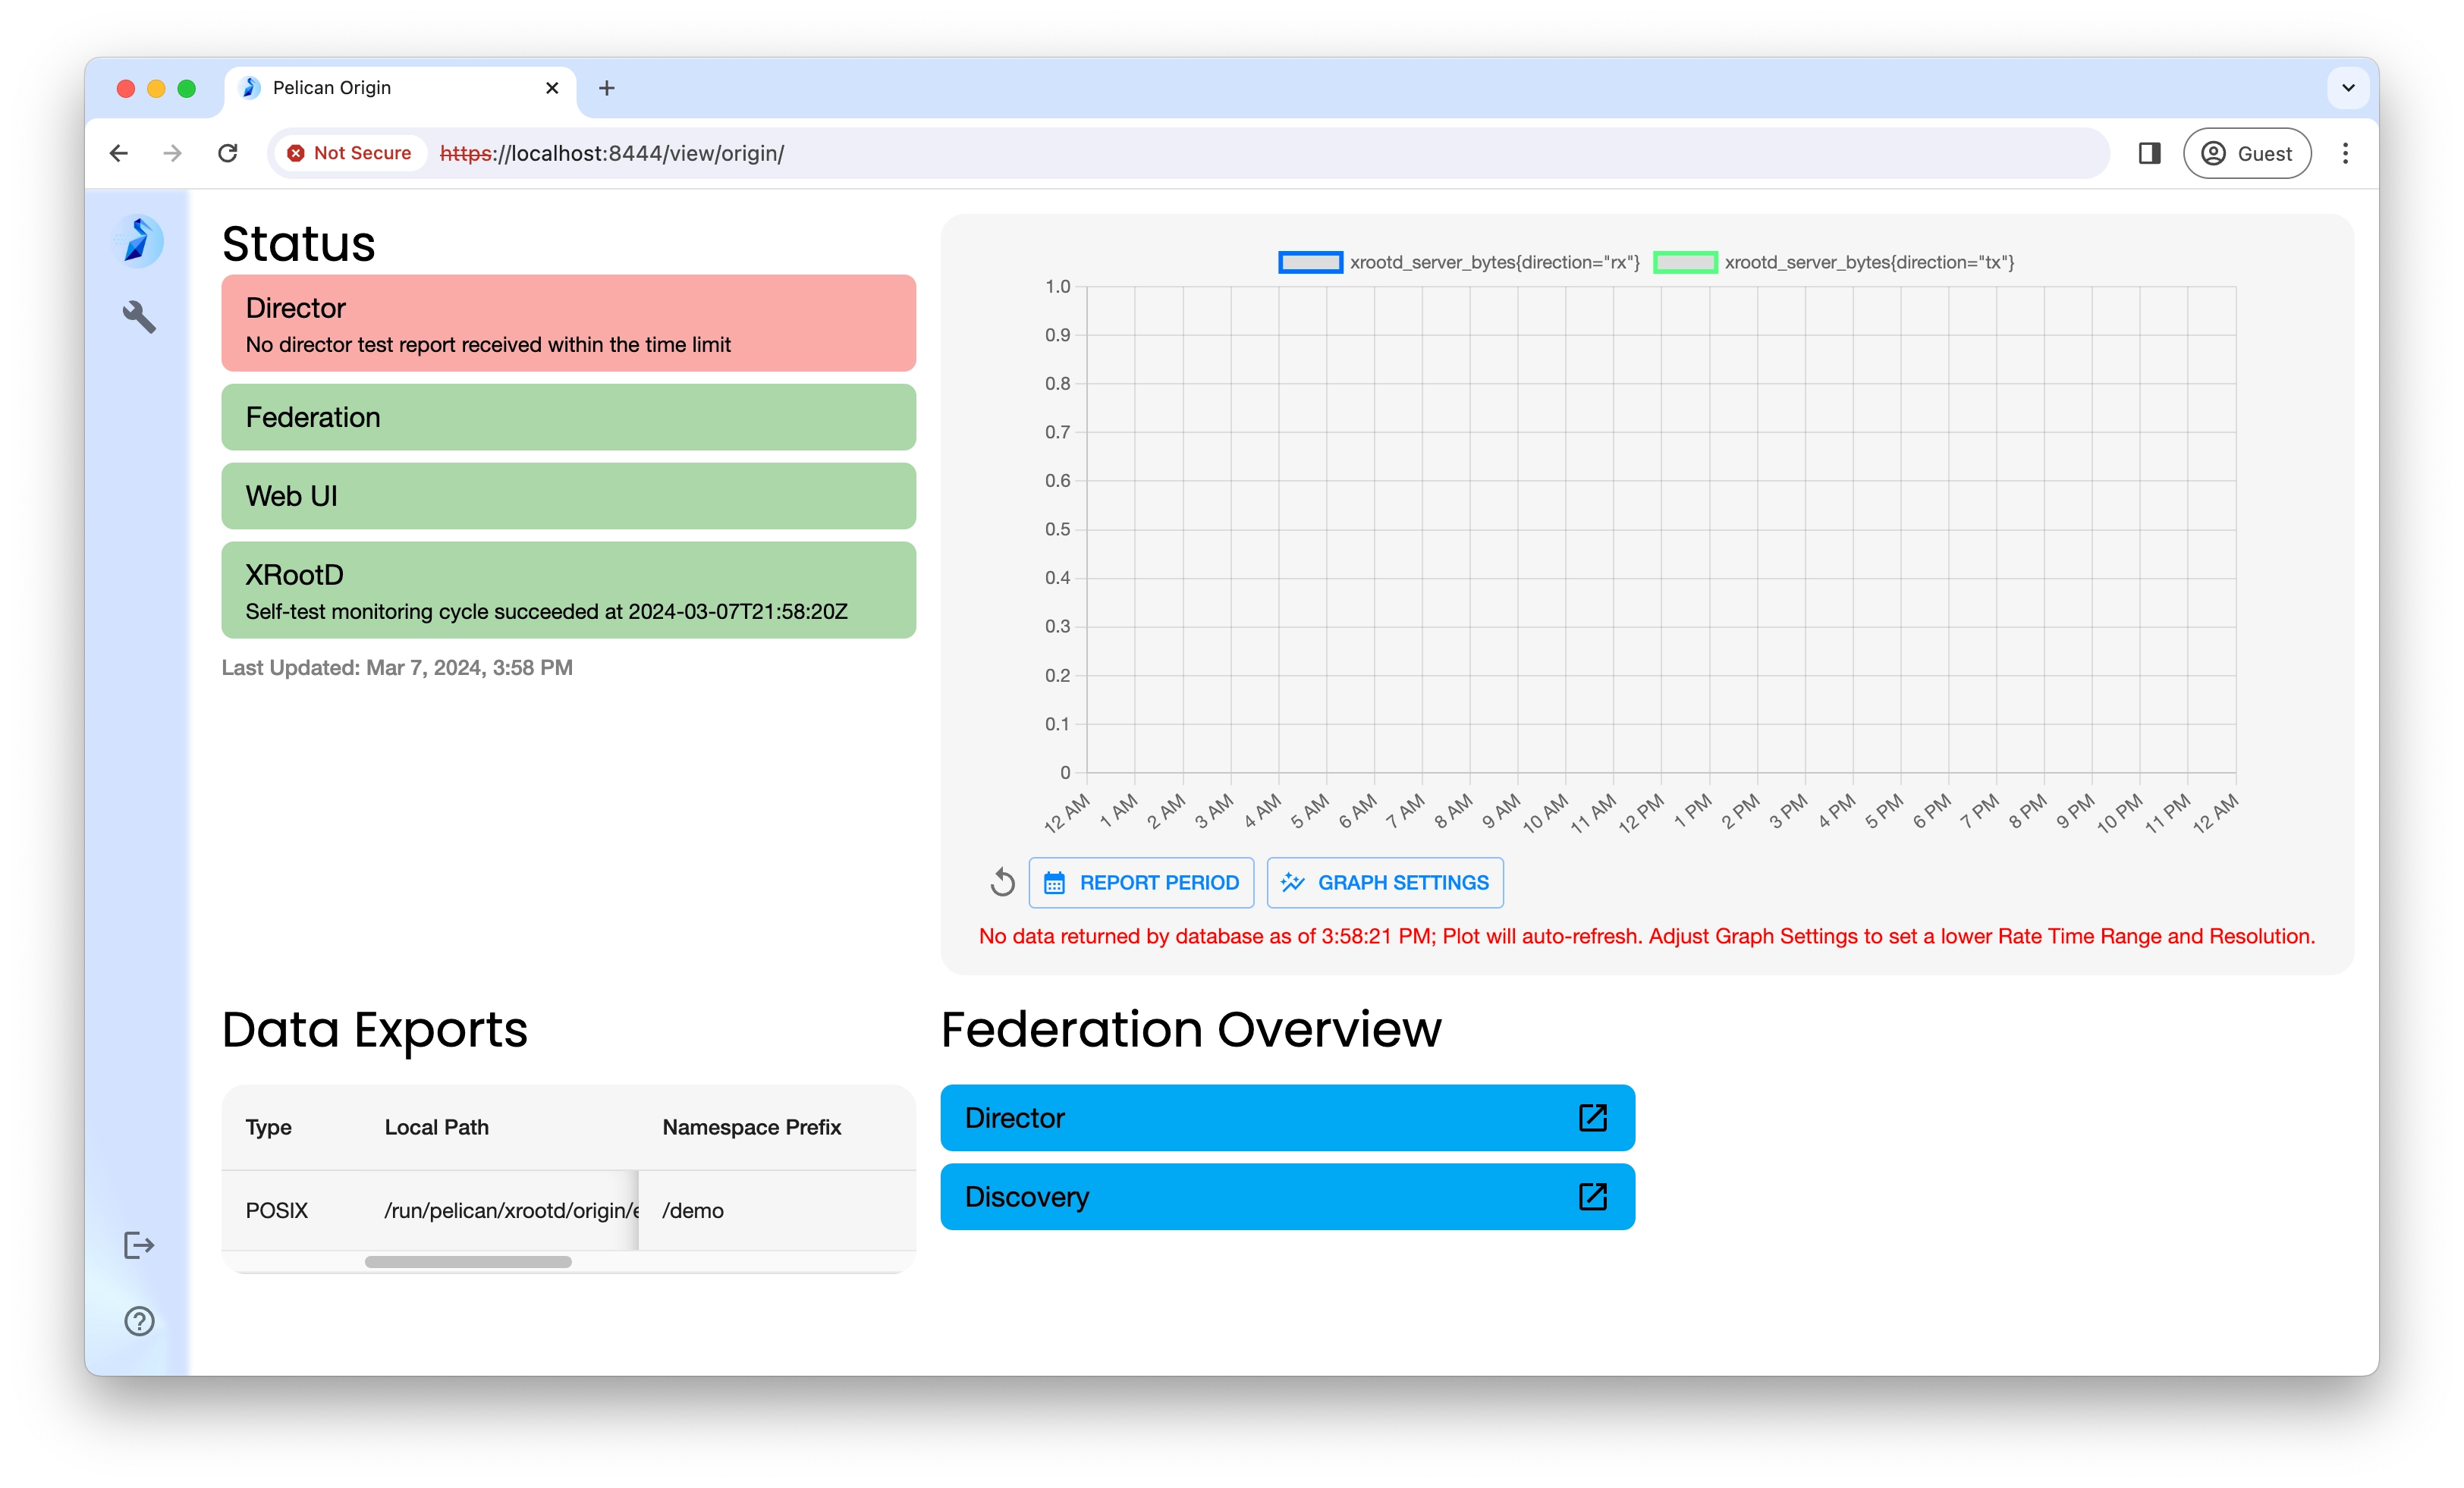
Here, the graph on the right visualizes object transfer metrics like transfer speed for both receiving (rx) and transmitting (tx) data. You may change the time range of the graph by changing the Reporting Period and Gragh Settings.
NOTE: This graph may be empty when the origin first starts, as it takes several minutes to collect enough data for the display. Try refreshing the page after the origin has been running for ~5 minutes and you you should see data being aggregated.
The Status panel shows information about your origin's health. It's components are:
- Director This indicates whether the origin can advertise itself to its federation director, which is required for other members in the federation to discover your origin's existence and how to access objects from it.
- Federation This indicates whether the origin can fetch metadata from the federation URL, which the origin uses to discover the federation's central services (Director and Registry).
- Web UI This indicates whether the admin website is successfully configured and running.
- XRootD This indicates whether Pelican's underlying file transfer software is functioning as expected.
The Data Exports panel lists information about the federation prefixes that are currently being exported by the origin
The Federation Overview panel lists the links to various federation services (director, registry, etc.). Note that the link to the Discovery item is the endpoint where the metadata of a federation is located.
For local deployment
When you hit the URL at https://localhost:8444/view/initialization/code/ (opens in a new tab), You may see a warning that looks like the following (with some differences depending on the browser you use):
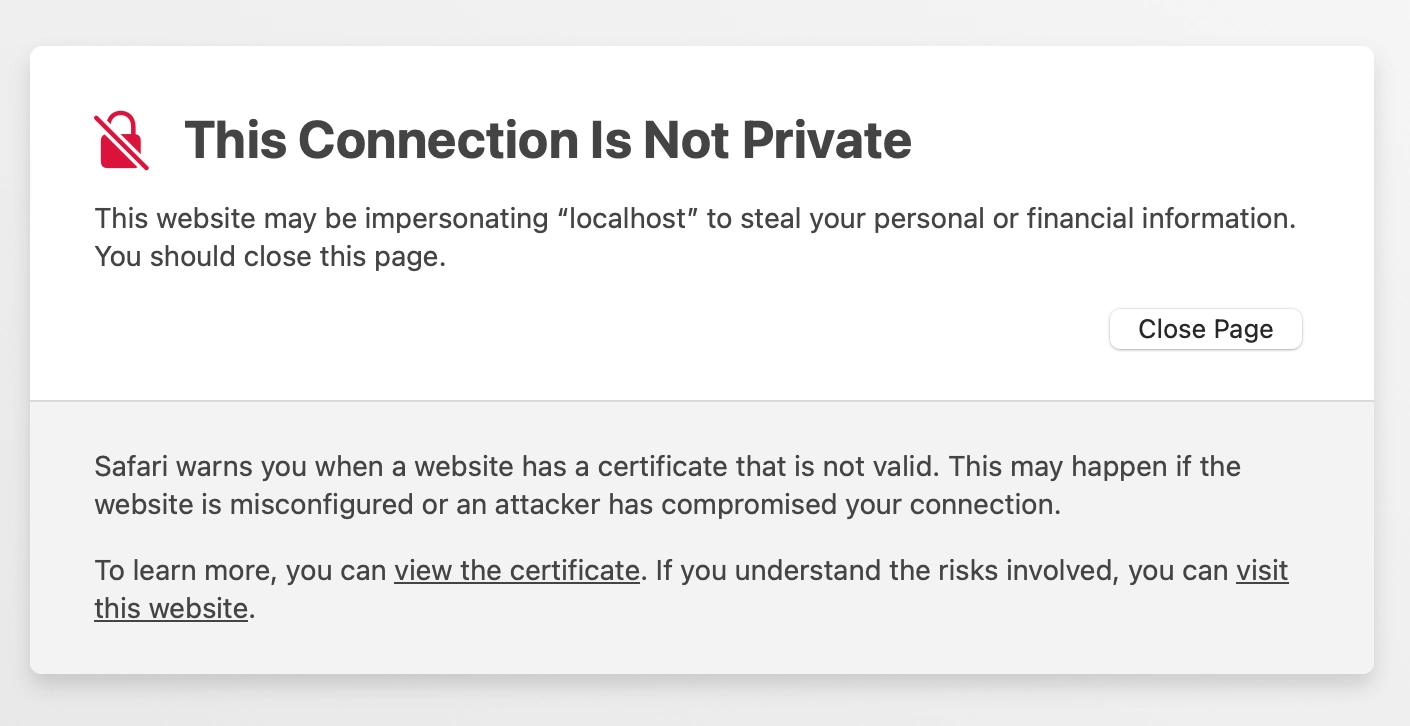
The warning is due to the fact that Pelican servers by default use https for network requests, which requires a set of TLS certificates to secure the connection between the server and the browser. If you don't have TLS certifacates properly configured and you turned on the TLSSkipVerify configuration parameter, then the origin will generate a set of self-signed certifacates that are not trusted by the browser.
For local testing, it's OK to proceed with the warning for local deployment.
Test Origin Functionality
Once you have your origin set up, follow the steps below to test if your origin can serve a file through a Pelican federation. It's best to test your origin while it's serving public data to minimize the risk that any test tokens you generate may be malformed and the reason objects can't be pulled through the origin.
-
Create a test file under the directory on your host machine that binds to a Pelican namespace. This the
<local_directory>in-v <local_directory>:<namespace_prefix>argument when you run the Pelican origin. Assuming your directory is/tmp/demo, run the following command to create a test file namedtestfile.txtunder/tmp/demoecho "This is a test file.\n" > /tmp/demo/testfile.txt -
In a separate terminal, run the following command to get the data from your origin through the Pelican federation
$ cd ~
$ pelican object get -f <federation> <namespace_prefix>/testfile.txt .
Where:
cd ~switches the working directory to yourhomedirecotry<federation>is the same URL you pass to-fargument when running the origin<namespace_prefix>is the-v <local_directory>:<namespace_prefix>argument when running the origin.
You should see the output like the following:
$ pelican object get -f <federation> /demo/testfile.txt . testfile.txt 36.00 b / 36.00 b [=============================================================================================] Done! -
Confirm the file content by running:
$ cat testfile.txt
This is a test file.
Congratulations! Your have finished setting up and running your origin.
Obtain the Public Key of the Origin
Pelican origins follow OpenID Connect (OIDC) (opens in a new tab) protocol for authenticating users for object access. In the OIDC setup, a user's identity is encoded in a token that is signed by the origin, using its private key. The private key only lives on the origin server and is never exposed to the public. To verify the integrity the token and make sure it's not tampered by malicious attackers, a public key generated from the private key is available for others to use to check the signature of the token.
The public keys are used in a Pelican federation to facilitate user authentication and server identity verification. They are also used to register a namespace at the Pelican registry. The public key used to register a namespace at the Pelican registry should be the public key of the Pelican origin that exports and hosts the namespace. This is because the Pelican origin manages user identity verification and authorization for the namespaces it exports. To look up the public key of a Pelican origin, go to https://<your-origin-hostname>:<origin-web-port>/.well-known/issuer.jwks. The public key will be automatically downloaded as a JSON file. An example file is as following:
{
   "keys":[
      {
         "kty":"EC",
         "use":"sig",
         "crv":"P-256",
         "kid":"sig-1712605941",
         "x":"c3BhLEMGqmO98-43pD3R5DJtUGIQf4McsNBWuVTorVI",
         "y":"eWssaV6WrG4kVla1Ygdr_qUZeqgN7I2fDeb3K1qL0qI",
         "alg":"ES384"
      }
   ]
}
Note that you need to run your Pelican origin before downloading the public key