Federating Your Data via a Pelican Origin
Pelican users who want to share data within a Pelican federation do so via an Origin. Origins are a crucial component of Pelican’s architecture for several reasons: they act as an adapter between various storage backends and Pelican federations, they provide fine-grained access controls for that data, and they act as a circuit breaker that protects the underlying data repository from large volumes of data movement. That is, they figure out how to take data from wherever it lives (such as a POSIX filesystem, S3 buckets, HTTPS servers, etc.) and transform it into a format that the federation can utilize, all while respecting your data access requirements and protecting the storage they make accessible.
An important distinction between Origins and data backends is that, generally speaking, Origins do NOT store any data themselves; their primary function is to facilitate data accessibility.
Are you setting up an Origin to connect to the OSDF? If so, please read the OSDF documentation for system administrators here: osg-htc.org/docs/data/osdf/overview/ .
Before Starting
This guide assumes you’ve already installed Pelican. If you haven’t, see Installing Pelican for more information.
There are three important prerequisites to adding your data to a federation through serving a new Origin. These include:
- Making sure your Origin can connect to internet-accessible ports so it can receive/send internet traffic
- Acquiring a domain name with TLS credentials so that other Pelican services know how to find your Origin on the internet
- Picking a federation to join and the namespace prefixes you want to claim in that federation
If it is not possible for you to expose any ports through the firewall (e.g. you’re on a local network or behind a NAT) or you can’t get a domain name, Pelican has a special feature called a Connection Broker that allows you to serve Origins without publicly-accessible ports or TLS credentials. However, this is an experimental feature and requires the Pelican federation you are joining to be compatible. If you are interested in learning more about the Connection Broker, please contact help@pelicanplatform.org for further instructions.
Enable Time Synchronization
Pelican servers rely on time-sensitive tokens for authorization. If your server’s clock is not synchronized, tokens may be rejected and your Origin may fail to join the federation. Please ensure NTP is enabled on your server. See Server Prerequisites for setup instructions.
Origin Port Requirements
Pelican Origins have two major components — one is a data transfer endpoint powered by XRootD , and the other is a browser interface that lets you configure, monitor, and troubleshoot your Origin and its interactions with a federation.
By design, these two components are hosted behind two separate ports, each dedicated a distinct function.
Pelican has chosen ports 8443 for data transfers and 8444 for the browser interface as defaults, but you may change these port numbers through your Origin’s configuration file with parameters Server.WebPort and Origin.Port, respectively.
In order for Pelican Origins to work properly, both of these ports need to be accessible by the federation, which in most cases means they need to be open to the internet. If your server host has a firewall policy in place, please open these two ports for both incoming and outgoing TCP requests.
Preparing TLS Credentials
Data transfers in Pelican rely on HTTPS, the web encryption scheme used by everyone from banks to instagram that’s responsible for securely transmitting data between internet-connected computers. To configure the Origin with HTTPS, you’ll first need to acquire three things:
- A valid Transport Layer Security (TLS) certificate
- The private key associated with the certificate
- The Intermediate Certificate or the chain file, that establishes the trust chain to a root certificate
You need to contact a Certificate Authority (CA) who owns the root certificate for getting these credentials. One popular CA that provides free TLS certificates is Let’s Encrypt . You may follow their guide to obtain the credentials listed above. Note that you need to have a valid domain before proceeding.
Once you go through the process, locate your credential files and set the following parameters to the file locations or copy the credential files to the default locations of the parameters:
-
Server.TLSCertificateChain- The certificate chain file from Let’s Encrypt (or another CA), usually named example.com.crt or example.com.pem, containing the host certificate followed by any required intermediate certificates.
- Default location:
~/.config/pelican/certificates/tls.crtfor non-root users or/etc/pelican/certificates/tls.crtfor root users.
-
Server.TLSKey- The private key corresponding to the TLS certificate, usually named as
example.com.key. - Default location:
~/.config/pelican/certificates/tls.keyfor non-root users or/etc/pelican/certificates/tls.keyfor root users.
- The private key corresponding to the TLS certificate, usually named as
-
Server.TLSCACertificateFile- The intermediate certificate from Let’s Encrypt to establish the trust chain to a root certificate, usually named as
letsencrypt-intermediate.pemorchain.pem - Default location:
~/.config/pelican/certificates/tlsca.pemfor non-root users or/etc/pelican/certificates/tlsca.pemfor root users.
- The intermediate certificate from Let’s Encrypt to establish the trust chain to a root certificate, usually named as
Since your TLS certificate is associated with your domain name, you will need to change the default hostname of Pelican server to be consistent. Set Server.Hostname to your domain name (e.g. example.com).
Picking a Federation and your Namespace Prefix(es)
Before serving an Origin, you need to decide which federation your data will be accessed through. For example, the Open Science Data Federation (OSDF) is Pelican’s flagship federation, and if you are interested in serving an OSDF Origin, you can refer to the OSDF website for details about how to join. If you’re unsure about which federation to join and aren’t ready to run your own federation, this is a good place to start.
All federations are uniquely identified by their URL. For example, the OSDF’s URL is https://osg-htc.org and Pelican command line client commands that interact with objects from this federation would indicate this by using Pelican URLs like pelican://osg-htc.org/some/namespace/path.
Once you’ve picked a federation, you should think about the namespace prefix(es) you’ll want to tie your data to.
Namespace prefixes map data from Origins into something resembling a “file path” within their federation.
For example, an S3 bucket with data about whale sightings may be mapped to the namespace prefix /whales, such that an object named 2025-sightings.csv in the bucket would be referred to as /whales/2025-sightings.csv.
Its fully-qualified name, scoped to the federation, would then be pelican://<federation URL>/whales/2025-sitings.csv.
While it’s convenient to think of these prefixes as file paths, it should be noted the comparison is only logical — there isn’t necessarily a /whales directory anywhere.
For more information about how to choose prefixes, see Choosing a Namespace Prefix
Origin Configuration
Before an Origin can serve data within a Pelican federation, it must be configured with key settings that define its identity, storage exports, network access, and security policies. These settings ensure that the Origin integrates properly with the federation and enforces your site’s operational and access control requirements.
The configuration is organized into several areas, each covering different aspects of Origin behavior. The following sections describe these configurable components in detail and guide you through the choices needed to operate a functional and secure Origin.
Configurable Components
Origin functionality is affected by any configuration option in the Configurable Parameters that lists * or origin as a component.
These primarily consist of:
- Logging configuration: Used to set the logging verbosity of various Pelican/XRootD processes
- Federation configuration: Used to point the Origin at a specific federation
- Origin configuration: Used to specify exports, set up Origin access to the object store, and configure access policies and throttling
- Server configuration: Used to modify hostname/port setup, configure the server’s TLS credentials, and control other aspects of the server runtime
- Issuer configuration: Used for setting up a local OA4MP token issuer on behalf of the Origin
- XRootD configuration: Used to control the Origin’s underlying XRootD instance
- Monitoring configuration: Used to tune the Origin’s embedded Prometheus instance and the way it records Origin metrics
While each of these sections of configuration may be used to tailor the Origin to a specific use case, several will be required by almost all Origins.
These include the Federation, Server and Origin-level configurations.
Before continuing, it may be worth exploring these sections of documentation to understand which options you may need when setting up your Origin.
See Example Configurations for additional examples covering how to combine these into a coherent Origin configuration.
Origin and Namespace Capabilities
Origins and namespaces can be configured with a set of capabilities, which are the configuration options used to define data access controls.
These capabilities are most often configured in the Exports section of the Origin configuration block, e.g.:
Origin:
  Exports:
    - FederationPrefix: /my/prefix
      StoragePrefix: /some/directory

      # Capabilities define how your data can be accessed
      Capabilities: ["PublicReads", "Writes"]
This list of capabilities can be used for further control of what types of operations the namespace is willing to support.
Available capabilities include:
Reads: When included, objects from the namespace can be read with a valid authorization token.PublicReads: When set, objects from the namespace become public and require no authorization to read.Writes: When included, objects can be written back to the storage backend by Pelican. Write operations always require a valid authorization token.DirectReads: When included, a namespace indicates that it is willing to serve clients directly and does not require data to be pulled through a cache. Disabling this feature may be useful in cases where the Origin isn’t very performant or has to pay egress costs when data moves through it. Note that this is respected by federation central services, but may not be respected by all clients.Listings: When included, the namespace indicates it permits object discovery. Authorization requirements for listing objects through an Origin are tied to the values ofReadsandPublicReads. If your namespace setsReads, object discovery will require a valid token, while prefixes withPublicReadswill not require tokens. This capability is required if your Origin must support any recursive operations, such as downloading entire directories or object prefixes.
Most Origins should have either Reads or PublicReads enabled. If neither is set, the Origin won’t export any data.
There is an important distinction between Origin capabilities and namespace capabilities. While it’s sometimes easy to treat Origins and namespaces as the same thing, Pelican must distinguish between them because two separate Origins may export portions of the same namespace, and a single Origin may export two disparate prefixes. The only exception to this rule is when a single Origin serves a single namespace, or the Origin exports multiple prefixes that should all have the same capabilities.
To configure Origin capabilities, you can set top-level options for the Origin:
Origin.EnableReads: When true, the Origin supports reads that are accompanied by a valid authorization token.Origin.EnablePublicReads: When true, the Origin supports reads by anyone without an authorization token.Origin.EnableWrites: When true, objects can be written back to the storage backend through the Origin. Writes always require a valid authorization token.Origin.EnableDirectReads: When true, the Origin indicates it’s willing to serve clients directly, potentially without caching data. Note that this is respected by federation central services, but may not be respected by all clients.Origin.EnableListings: When true, the Origin will allow object discovery.
If no Origin.Exports block is provided to Pelican, these values will also be applied to your federation prefix.
Pelican tries to resolve differences between Origin and namespace configurations by respecting the more restrictive of the two. If you serve an Origin that enables public reads, but the underlying prefix it exports disables all reads, you won’t be able to read from that namespace.
Origin with GitHub OAuth2 for Protected Namespaces
For Origins that require token-based authentication (i.e., namespaces with Reads instead of PublicReads), Pelican can be configured to authenticate users via GitHub OAuth2.
This allows you to restrict data access to members of specific GitHub organizations.
GitHub uses OAuth2, not full OIDC (OpenID Connect). This means you need to explicitly configure the OAuth endpoints and specify which claims to use from GitHub’s user info response (see the configuration example below).
Prerequisites
- Create a GitHub OAuth App: Go to GitHub Developer Settings and create a new OAuth App.
- Set the callback URL: Use
https://<your-origin-hostname>/api/v1.0/auth/oauth/callbackas the authorization callback URL. - Note your credentials: Save your Client ID and generate a Client Secret.
- Grant organization access: If you want to restrict access based on GitHub organization membership, you must authorize the OAuth App to access those organizations.
Configuration
Add the following to your Origin’s configuration file to enable GitHub OAuth2:
# GitHub OAuth2 endpoints (required since GitHub doesn't support OIDC discovery)
OIDC:
  Issuer: https://github.com
  AuthorizationEndpoint: https://github.com/login/oauth/authorize
  TokenEndpoint: https://github.com/login/oauth/access_token
  UserInfoEndpoint: https://api.github.com/user
  DeviceAuthEndpoint: https://github.com/login/device/code

  # Your GitHub OAuth App credentials
  ClientID: <your-github-client-id>
  ClientSecretFile: /path/to/client-secret-file

  # GitHub-specific scopes
  Scopes:
    - user
    - read:org  # Required for organization-based access control

Origin:
  EnableIssuer: true
  EnableOIDC: true
  # Note: Pelican's built-in OA4MP token issuer currently supports only one
  # protected (non-public) export per Origin. This limitation applies to all
  # authentication providers, including GitHub and CILogon. However, the Origin
  # can still export any number of fully-public namespaces.
  Exports:
    - FederationPrefix: /my-origin/protected-data
      StoragePrefix: /data
      # No PublicReads - this is a protected namespace
      Capabilities: ["Writes", "DirectReads", "Reads", "Listings"]

Issuer:
  # GitHub returns "login" for username instead of OIDC standard "sub"
  OIDCAuthenticationUserClaim: login
  # GitHub returns "id" (numeric) instead of OIDC standard "sub"
  OIDCSubjectClaim: id
  # Use GitHub organization membership as groups
  GroupSource: github

  # Require users to be members of at least one of these GitHub orgs
  GroupRequirements:
    - "my-github-org"

  # Define authorization based on GitHub org membership
  # The `prefix` field specifies which path under the FederationPrefix to authorize.
  # Use "/" to grant access to the entire namespace, or a subpath like "/subdir" for finer control.
  AuthorizationTemplates:
    - actions: ["read", "create", "modify"]
      prefix: "/"
      groups: ["my-github-org"]

Server:
  ExternalWebUrl: https://your-origin.example.com
  # Grant admin access to specific GitHub users
  UIAdminUsers: ["<your-github-username>"]
User Authentication Flow
When a user attempts to access data from a protected namespace, they will go through the following device authorization flow:
-
Run the Pelican client command:
pelican object get pelican://<federation-url>/my-origin/protected-data/file.txt . -
Enter the local client password (if configured).
-
Follow the authorization URL: The client will display a URL like:
https://<origin-hostname>/api/v1.0/issuer/device?user_code=XXXX-XXXX -
Authenticate with GitHub: The user is redirected to GitHub’s login page.
-
Grant consent: After GitHub authentication, the user sees a Pelican consent page.
-
Access granted or denied:
- If the user is a member of a required GitHub organization (e.g.,
my-github-org), access is granted. - If the user is not a member, they will see an authorization error:
Authorization Error: Error code 4000: acquired token not valid for /my-origin/protected-data/file.txt
(missing scope or namespace/base-path mismatch)
- If the user is a member of a required GitHub organization (e.g.,
For organization-based access control to work, the GitHub OAuth App must have permission to access the organization. Users must grant this permission when authorizing the app.
Multi-Export Origins
Origins can export more than one prefix, and these are referred to as “multi-export” Origins.
This is accomplished by enumerating the exports in the Origin’s Origin.Exports configuration block, e.g.:
Origin:
  Exports:
    - FederationPrefix: /some/prefix-1
      StoragePrefix: /first/directory
      Capabilities: ["PublicReads", "Writes"]
    - FederationPrefix: /some/prefix-2
      StoragePrefix: /second/directory
      Capabilities: ["PublicReads", "Writes"]
This kind of setup lets you to control exactly which storage resources are federated via the Origin so that only the data you want to make public is accessible. In addition to exporting multiple storage resources (directories, buckets, etc.), the capabilities defined for each export can be distinct, letting you define access control policies per export:
Origin:
  Exports:
    # This export is publicly readable
    - FederationPrefix: /my/read-only/public/data
      StoragePrefix: /first/directory
      Capabilities: ["PublicReads"]

    # This export is readable & writeable, but only by those with an
    # appropriate access token
    - FederationPrefix: /my/protected/data
      StoragePrefix: /second/directory
      Capabilities: ["Reads", "Writes"]
While Pelican can handle multiple export directories for POSIX Origins, these directories must not be nested within one another. As a result, the following configuration is illegal because one namespace prefix maps to a subdirectory of another namespace prefix:
Origin:
  Exports:
    - FederationPrefix: /some/prefix-1
      StoragePrefix: /first/directory
      Capabilities: ["PublicReads", "Writes"]
    - FederationPrefix: /some/prefix-2
      StoragePrefix: /first/directory/subdirectory
      Capabilities: ["PublicReads", "Writes"]
Multiple namespaces can be exported by the same Origin but they must all have the same underlying storage type. That is, if the Origin serves files from POSIX, it can only serve files from POSIX and not objects from S3. However, separate Origins can serve files from POSIX and objects from S3 under the same namespace prefix, allowing the Origin administrators to aggregate data under a unified namespace.
One current limitation to be aware of is that failure to advertise any of the prefixes in a multi-export Origin will prevent the entire Origin from functioning. For example, if your federation requires an administrator to pre-approve namespaces (as does the OSDF) but only a subset of the namespaces from the Origin are approved at the Registry, this will prevent the entire Origin from joining the federation. See Federation Namespace Prefix Registration for more details.
Example Origin Configurations
This section contains several example configurations for Pelican Origins from minimal to complex. It is not intended to cover all possible Origin configurations, but rather give a brief overview of what several valid configurations look like and how you might start developing your own.
These examples cover use cases where data comes from a POSIX backend, the filesystem used by Unix/Linux computers. However, Pelican aims to support a variety of backends and currently supports serving objects from S3 and Globus in addition to POSIX. Configuration for these backends is mostly similar to configuration for POSIX file systems, but with a few important differences. For details, refer to the S3 Backend and Globus Backend pages.
OSDF Origin, Single Export, Publicly-Readable
This example makes /my/directory from a POSIX filesystem publicly accessible via the OSDF as /my/namespace.
# Tell Pelican which federation you're joining
Federation:
  DiscoveryUrl: https://osg-htc.org

Server:
  # Specify which port the server's Web UI/Browser interface can be
  # accessed on. The default is 8444, but this config sets it to 443.
  WebPort: 443
  Hostname: my-origin.com

# Configure your Origin
Origin:
  # Specify which port data will be accessed on. 8443 is the default and
  # can be omitted.
  Port: 8443

  # POSIX is the default storage type for Pelican Origins
  # and can be omitted.
  StorageType: "posix"

  # Define which directories the Origin exports and how they should
  # map into the Federation's namespace.
  Exports:
    - StoragePrefix: "/my/directory"
      FederationPrefix: "/my/namespace"
      # Explicitly state what capabilities you want this prefix to have
      # Note this doesn't set Reads -- it's inferred by setting "PublicReads"
      Capabilities: ["PublicReads", "Listings"]
The data from this Origin’s underlying filesystem is designated as publicly readable, meaning anyone could issue Pelican client commands to interact with it.
For example, if there were a file called /my/directory/super-cool-data.csv, it could be downloaded as an object with the following command:
pelican object get pelican://osg-htc.org/my/namespace/super-cool-data.csv downloaded.txtOSDF Origin, Multiple Protected Exports
This example demonstrates a multi-export OSDF Origin that requires token auth for reads/writes:
Federation:
  DiscoveryUrl: https://osg-htc.org

Server:
  WebPort: 443
  Hostname: my-origin.com

Origin:
  # Example of changing the data access port to meet local firewall requirements
  Port: 1234

  StorageType: posix
  Exports:
    - StoragePrefix: /first/path
      FederationPrefix: /prefix-1
      Capabilities: ["Reads", "Writes", "Listings", "DirectReads"]

    - StoragePrefix: /second/path
      FederationPrefix: /prefix-2
      Capabilities: ["Reads", "DirectReads"]
UWDF Origin, Multiple Exports, Custom Issuer with Multiuser Feature
This example is more complex than the previous examples because it configures the Origin’s “Multiuser” feature and makes use of a non-local token issuer.
This feature is useful for multi-tenant Origins because it lets the Origin’s XRootD daemon switch the user it acts as when it reads/writes from the filesystem.
XRootD determines which user to select by examining the auth token’s sub field.
Federation:
  DiscoveryUrl: https://chtc.wisc.edu


# Configure log levels and log file location
# This is useful for long-running servers whose logs may need to be monitored
# over time for debugging and reliability
Logging:
  LogLocation: /var/log/pelican/origin.log
  Level: "debug"

Server:
  WebPort: 443
  Hostname: chtc-origin.org

Origin:
  StorageType: posix

  # Turn on Multiuser in the Origin and configure scitokens subject mapping
  Multiuser: true
  ScitokensMapSubject: true

  Exports:
    - StoragePrefix: /first/path
      FederationPrefix: /prefix-1
      Capabilities: ["Reads", "Writes", "Listings", "DirectReads"]
      IssuerUrls: ["https://chtc.cs.wisc.edu"]

    - StoragePrefix: /my/data/private
      FederationPrefix: /my/prefix/private
      Capabilities: ["Reads", "DirectReads"]
      IssuerUrls: ["https://chtc.cs.wisc.edu"]

# Specify a human readable name for the Origin, which shows up in the Director's UI.
# Without this specification, the Origin would show up in the Director under its hostname
Xrootd:
  Sitename: UWDF-CLUSTER-1
Federation Namespace Prefix Registration
Registering a federation namespace prefix is the process of claiming the prefix with the federation’s Registry. This asserts your ownership over the namespace and gives you the ability to further subdivide the prefix by tying it to a public/private key pair you posses.
For more information about how to choose these prefixes, see Choosing a Namespace Prefix
Generally this process is a pre-requisite to setting up an functional Origin, but it’s not included in this page’s “Before Starting” section because Origins attempt to do this automatically on server startup. However, there are some cases where you may not wish to rely on this automatic feature. These may include:
- Your federation requires namespace registration approval and you want to complete this ahead of time
- You want to claim a namespace before you’re ready to serve an Origin
- You want to delegate running your Origin to someone else while maintaining control over the Origin’s issuer keys
- (OSDF Only) Your desired prefix needs to be added in both the Registry and Topology
This approach requires generating a keypair ahead of time because you’ll need your public key to complete registration. For more information about key generation, see Advanced Usage/Server.
To register your prefix through the Registry’s browser interface, visit the Registry for your federation (e.g. https://osdf-registry.osg-htc.org for the OSDF) and locate the namespace registration button.
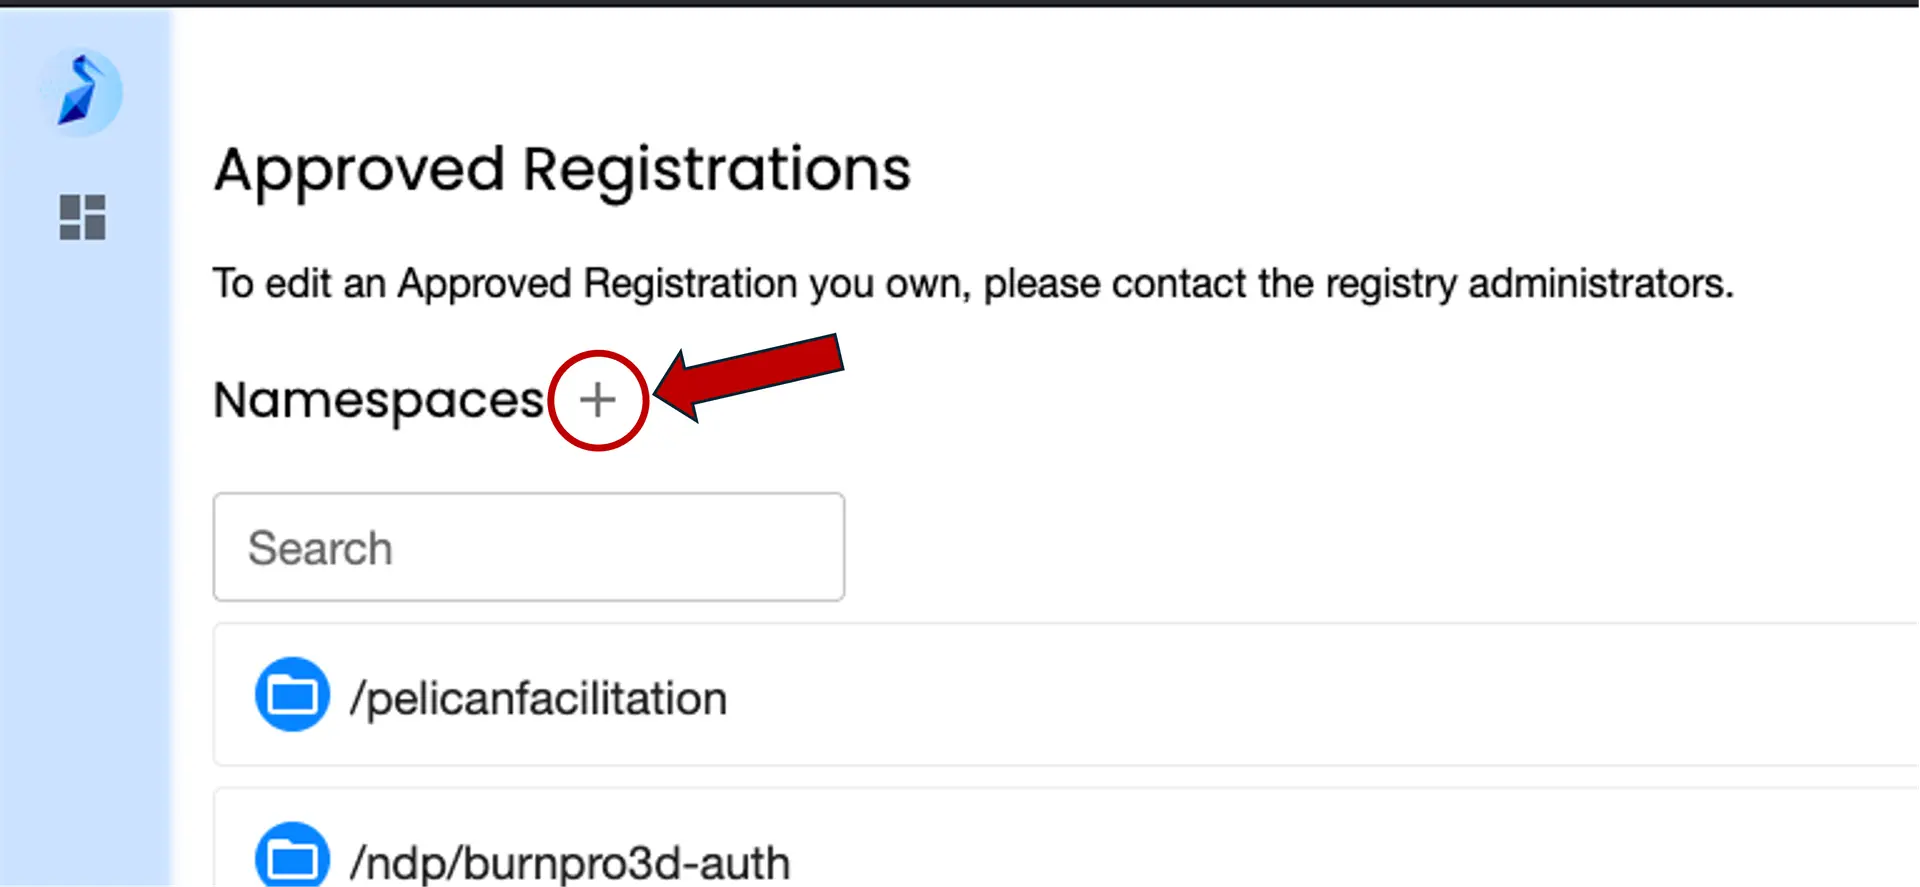
After clicking on the ”+” icon, you may be asked to log in with an OIDC provider, such as CILogon. In such cases, you’ll be asked to “Log in with OAuth”. While you shouldn’t need a pre-configured account with the Registry to add new registrations, some federations tie identifiers from services like CILogon to registrations for bookkeeping purposes.
After proceeding to the registration page, you should fill out fields as needed to register your the prefix.

Some versions of the Pelican CLI (v7.13.0 - v7.14.0) contain a bug that generates invalid public keys.
If your public key is missing the alg or kid fields as demonstrated in this example registration, you’ll should regenerate the keypairs with a compatible version of Pelican.
Finally, submit the registration, and if your federation requires namespace approval, contact the federation’s administrators to inquire about next steps.
In the meantime, store your private key someplace safe — once you’re ready to start your Origin, you’ll configure it to use the private key using the IssuerKeysDirectory configuration option.
Once your registration is complete/approved and your keys are hooked up to the Origin, your Origin should have control over your new prefix.
Serving & Administering Your Origin
Once you’ve drafted your Origin’s configuration and handled the pre-requisites from the Before Starting section, you’re ready to start serving data. This section covers starting the server, finishing setup through your browser, and basic commands to test the Origin’s data access functionality.
Starting the Origin
Once your Origin’s configuration is set, you can serve it immediately with
pelican-server origin serveIf you installed the pelican-server executable from an RPM package, you can daemonize your Origin to always run in the background with systemctl enable --now pelican-origin.
This assumes you understand the basics of systemd and is only recommended for advanced users.
When you do this, Pelican will read the config file and apply it to your Origin. The first time the Origin is started, you will see something that looks like the following:
$ pelican-server origin serve

Pelican admin interface is not initialized
To initialize, login at https://localhost:8444/view/initialization/code/ with the following code:
551220
See Logging in to the Origin’s Admin Page for more information about initializing your Origin’s admin website.
Additional Command Line Arguments for Origins
This section documents additional arguments you can pass via the command line when serving Origins.
-hor--help: Output documentation on theservecommand and its arguments.-mor--mode: Set the mode for the Origin service (‘posix’|‘s3, default to ‘posix’).-por--port: Set the port at which the Pelican admin website should be accessible.--writeable: A boolean value to allow or disable writing to the Origin (default is true).-v: A shortcut for configuring docker-style volume mounts/namespace prefixes for the Origin (POSIX only). For example,-v /local/path:/federation/prefixwill bind a directory/local/pathto the namespace prefix/federation/prefix. Use of configuration yaml is strongly preferred over this method because config passed with this flag cannot be picked up by tools likepelican config summary.--config: Set the location of the configuration file.-dor--debug: Enable debugging mode, which greatly increases the Pelican’s logging verbosity-lor--log: Set the location of a file that will capture Pelican logs. Setting this will prevent logging output from printing to your terminal.
For more information about available yaml configuration options, refer to the Parameters page.
Logging in to the Origin’s Admin Page
After your Origin is running, the next step is to initialize its admin website, which can be used by administrators for monitoring and further configuration.
To initialize this interface, go to the URL specified in the terminal.
By default, it should point to https://localhost:8444/view/initialization/code/
You will be directed to the page to activate the website with a one-time passcode. Copy the passcode from the terminal where you launch Pelican Origin and paste to the website to finish activation.

The example terminal from “Starting Your Origin” shows 551220, but your one-time passcode will be different.
These one-time passcodes will be refreshed every few minutes. Find the latest passcode in the terminal before proceeding.
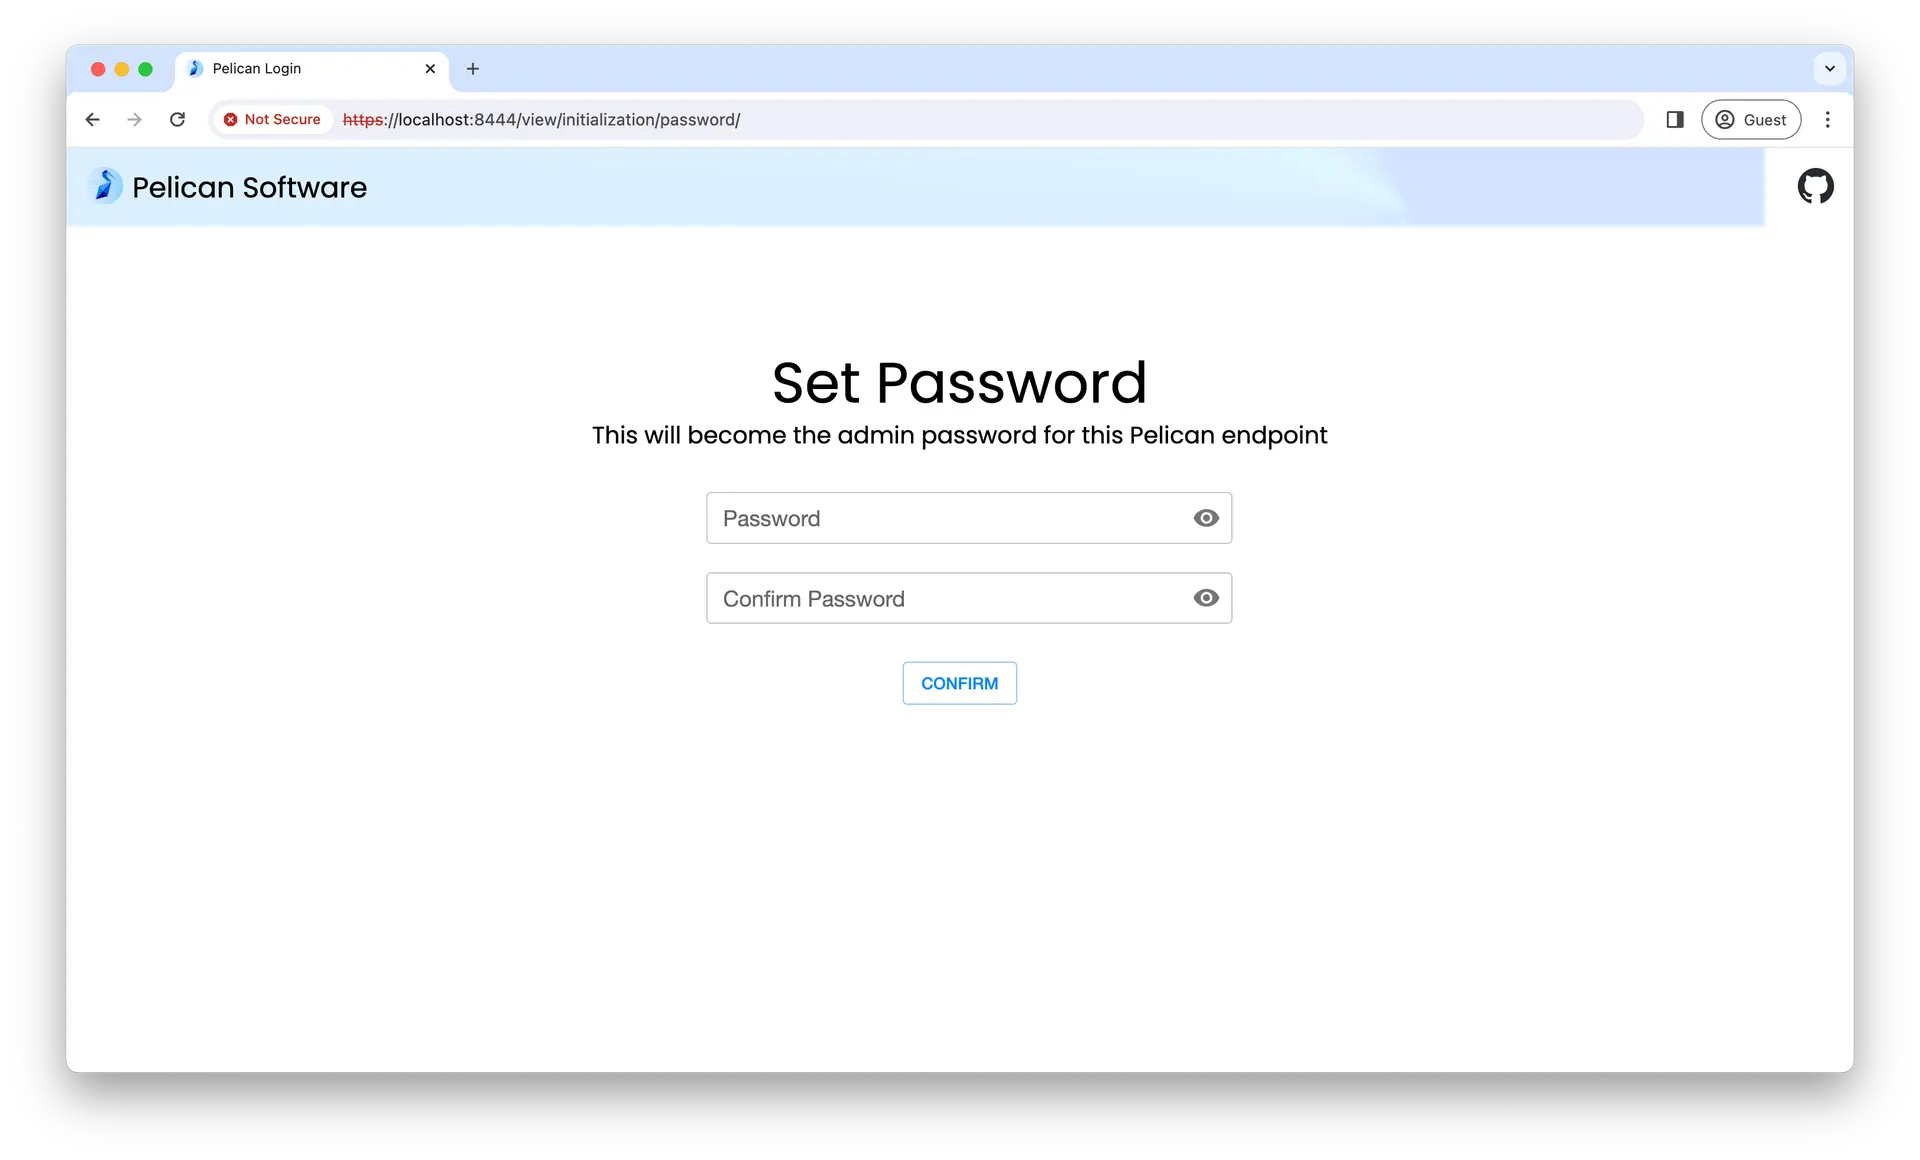
Set up password for the admin
After activating the website, you will be redirected to set up the password for the admin account. Enter your desired password and store the password in a safe location.
Visit the Origin’s Dashboard Page
Once the password is confirmed, you will be redirected to the Origin’s dashboard page.
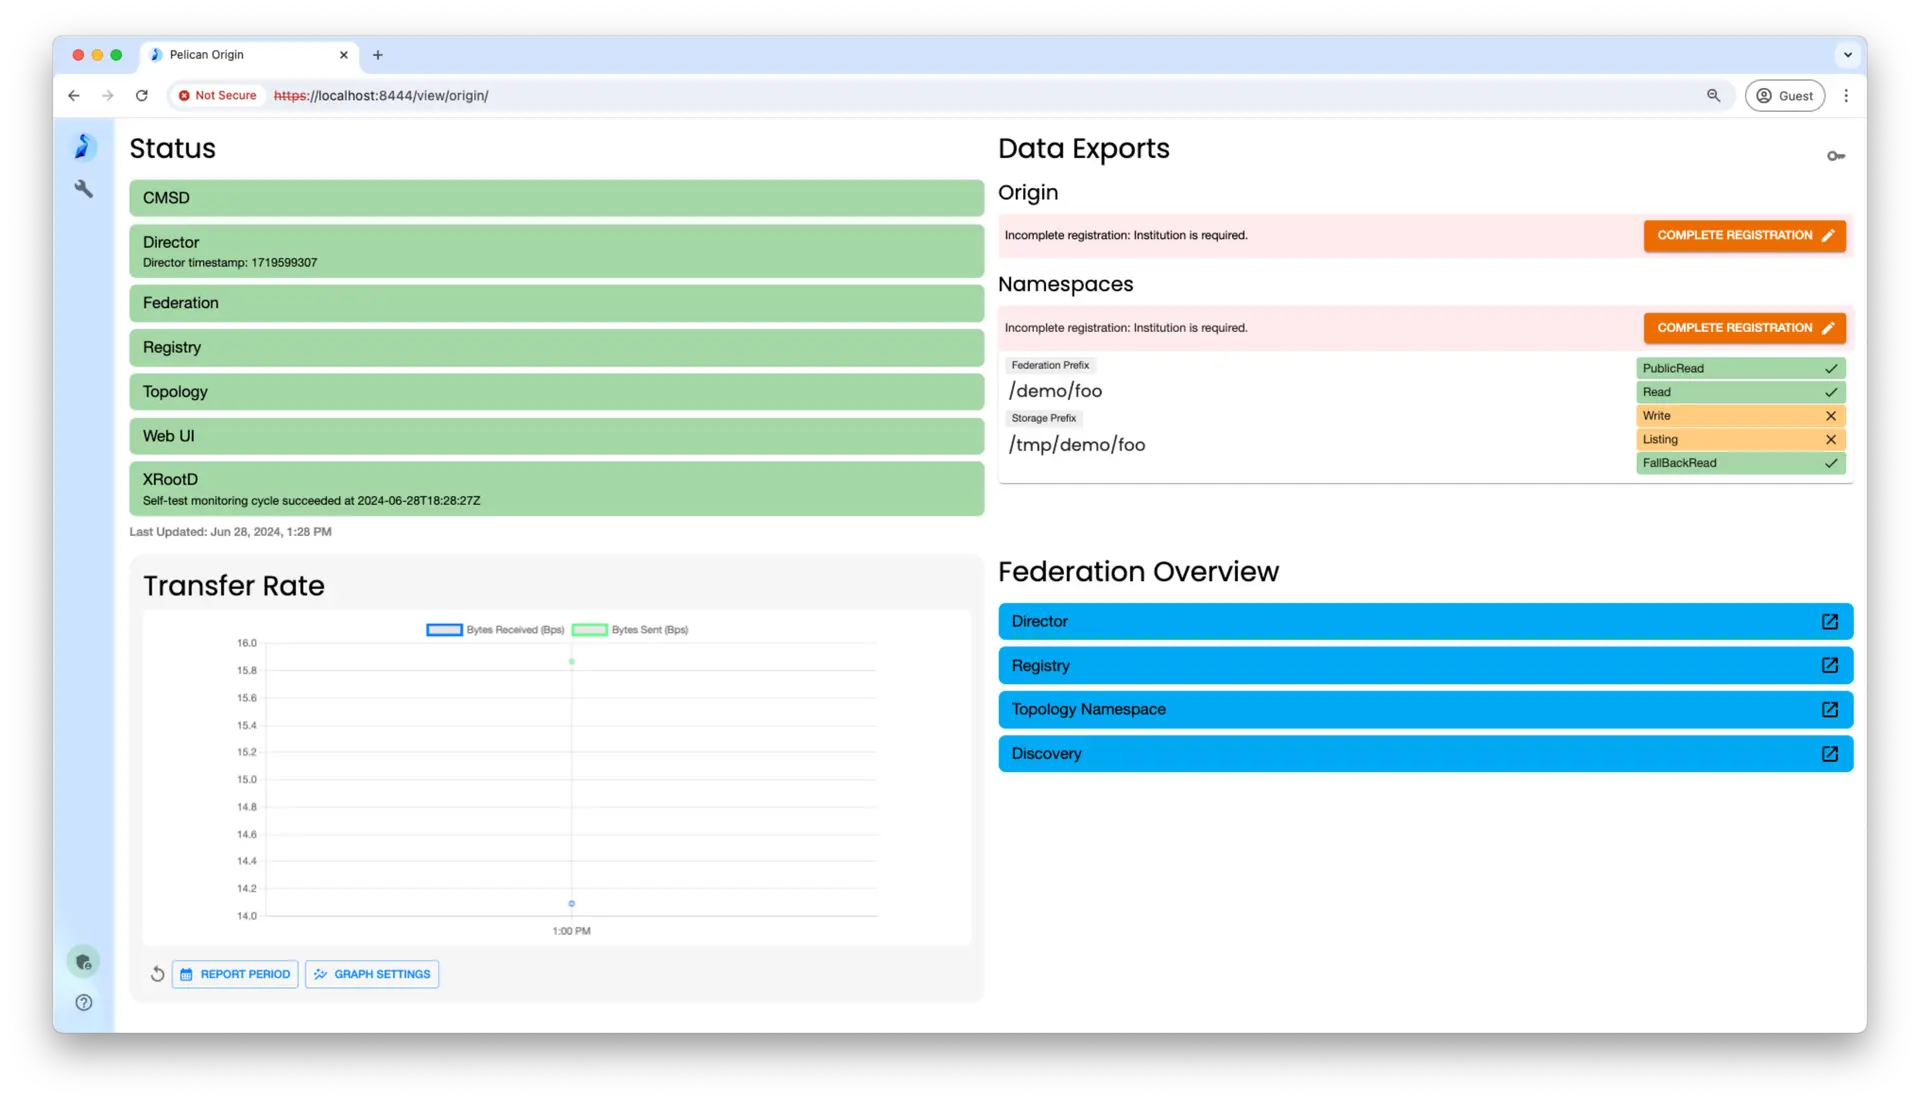
The Origin dashboard page consists of the following panels:
- Status
- Data Exports
- Federation Overview
- Transfer Rate
The Status panel shows information about the health status of the Origin, delineated by the following components:
- CMSD indicates whether the Cluster Management Service Distributed (CMSD) daemon is running.
- Director indicates whether the Origin can advertise itself to its federation director, which is required for other members in the federation to discover your Origin’s existence and how to access objects from it.
- Federation indicates whether the Origin can fetch from the federation discovery URL, which contains locations of central services (Director and Registry).
- Registry indicates whether the Origin successfully registered the federation prefixes it exports at the Registry.
- Web UI indicates whether the admin website is configured and running.
- XRootD indicates whether Pelican’s underlying file transfer software is functioning as expected.

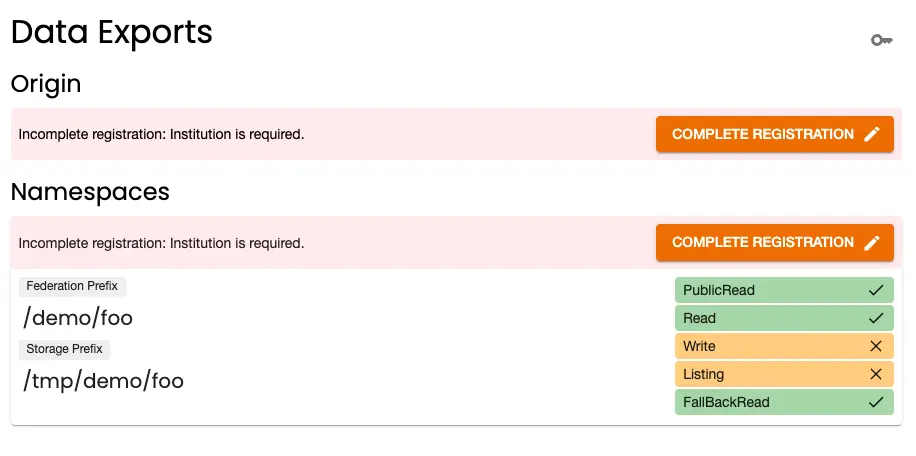
The Data Exports panel lists information about the federation prefixes that are currently being exported by the Origin. It also shows each prefix’s advertised capabilities, like “reads”, “writes”, or “listings”.
If any of the namespace prefix registrations is missing required information, there will be a warning message and a button to “Complete Registration”. Note that each namespace prefix is registered separately, and the Origin server itself also registers at the registry. It is advised that the Origin admin completes the registration as soon as they can.
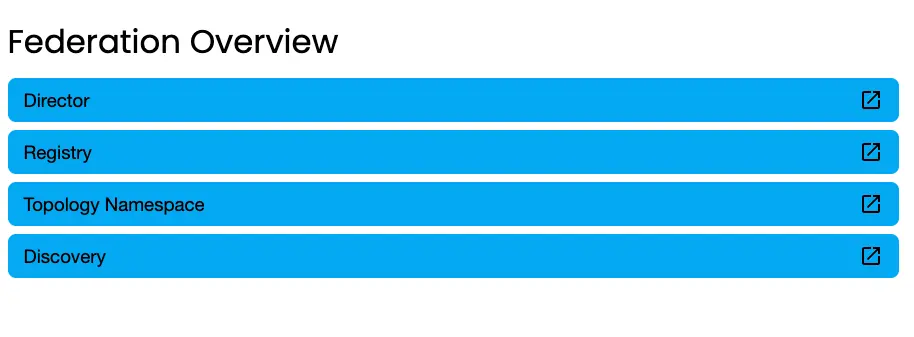
The Federation Overview panel lists links to various federation services (director, registry, etc.). Note that the link to the Discovery item is the federation discovery URL where the metadata of a federation is located.
The Transfer Rate graph visualizes object transfer metrics like transfer speed for both receiving (rx) and transmitting (tx) data. You may change the time range of the graph by changing the Reporting Period and Graph Settings.
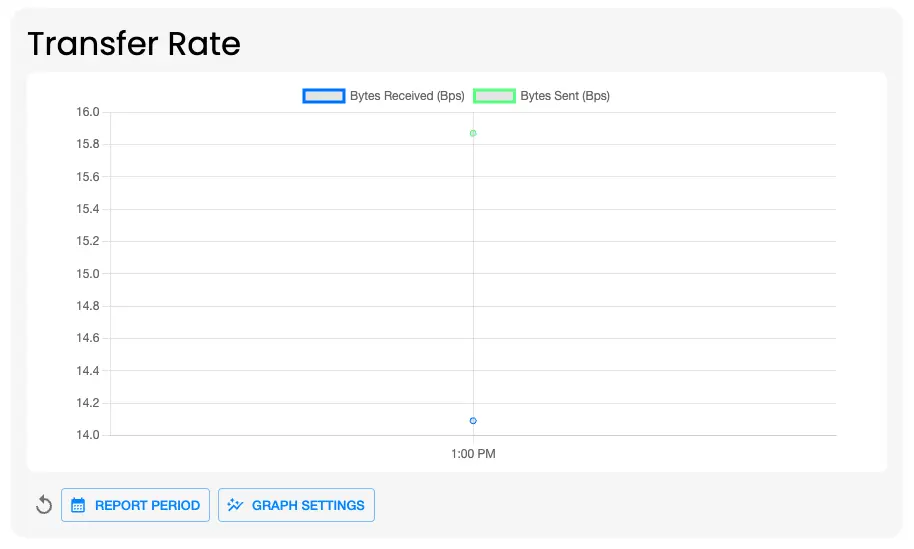
This graph may be empty when the Origin first starts, as it takes several minutes to collect enough data for the display. Try refreshing the page after the Origin has been running for ~5 minutes and you you should see data being aggregated.
Test Origin Functionality
Once you have your Origin set up, follow the steps below to test if your Origin can serve a file through a Pelican federation. It’s best to test your Origin while it’s serving public data to minimize the risk that any test tokens you generate may be malformed and the reason objects can’t be pulled through the Origin.
-
Create a test file under the directory on your host machine that binds to a Pelican namespace. Assuming your directory is
/tmp/demo, run the following command to create a test file namedtestfile.txtunder/tmp/demoecho "This is a test file." > /tmp/demo/testfile.txt -
In a separate terminal, run the following command to get the data from your Origin through the Pelican federation
$ cd ~
$ pelican object get pelican://<federation URL>/<namespace_prefix>/testfile.txt .
For example, if you registered the
/demonamespace in the OSDF, you would see output like the following:$ pelican object get pelican://osg-htc.org/demo/testfile.txt . testfile.txt 36.00 b / 36.00 b [=============================================================================================] Done! -
Confirm the file content by running:
$ cat testfile.txt
This is a test file.
Congratulations! Your have finished setting up and running your Origin.